Using the Administration Console
The TeamDrive Registration Server Administration Console is an application written in PHP that provides a web-based interface to perform the following tasks:
- View and edit user records / Import users using a CSV file
- View and edit user device records (manage clients, updates and banner)
- View and edit licences
- Create storage manually
- Manage Provider-specific email and html templates
- Manage general server and Provider-specific settings
Access to the individual sections of the Administration Console is controlled by access rights — most administration pages are only visible and accessible to users that have the required privileges.
Administrative users can be divided into three groups:
- The default Provider is usually the first one to be created. This
Provider can access and manage all aspects of the Registration Server and
can access his own users, devices, settings and licences as well as those of
all other providers hosted on this Registration Server. (A Registration
Server’s default Provider can be changed later by modifying the global
server setting
DefaultProvider) - Additional providers can only manage their own users, licences, and their Provider-specific settings. They can not access parts like global server settings.
- Each Provider can grant access to the Administration Console to regular users. These users can only access those sections enabled by their assigned privileges and may also only manage users of the provider they belong to.
Security Considerations
We strongly recommend accessing the Administration Console via SSL/HTTPS only. Our preconfigured Virtual Appliance images provide a self signed SSL certificate and access is possible via HTTPS only. You should replace this certificate with an official one, if this server is publicly accessible.
You can also limit access to the Administration Console to individual IP
addresses, by using the built-in provider setting LOGIN/LOGIN_IP. This
setting defines the IP addresses (as a comma-separated list) that are allowed
to connect to the Administration Console as a given provider.
If you require more flexibility in restricing access, e.g. by restricting it to an IP address range or by host/domain names, we suggest using the Apache http Server’s built-in functionality:
https://httpd.apache.org/docs/2.2/mod/mod_authz_host.html
The safest strategy is separating the Administration Console from the Registration Server by installing it on a dedicated server, which is only accessible by you.
Logging in / Logging out
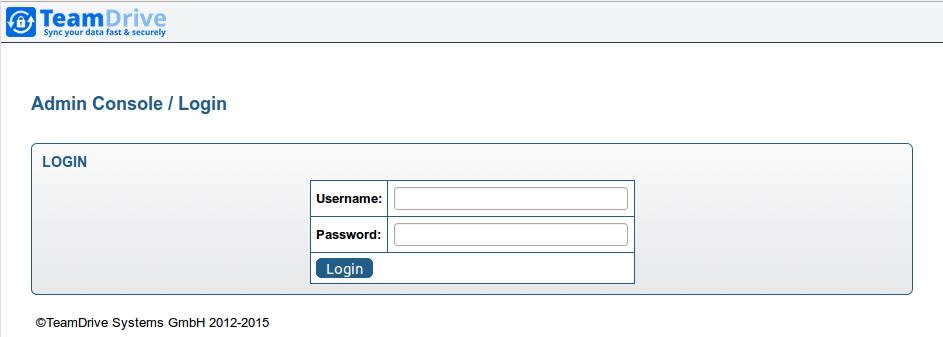
To log into the TeamDrive Registration Server Admin Console, open the Admin Console’s URL in your web browser, e.g.
https://regserver.yourdomain.com/adminconsole/
Enter your username and password to log in.
Access to the Administration Console is allowed for two separate user accounts:
- The provider accounts that manage all aspects of a provider. These accounts are defined when setting up the Registration Server or by creating additional providers on the same Registration Server.
- Regular TeamDrive users can also log in, if they have permission to log in to the console (see User Rights).
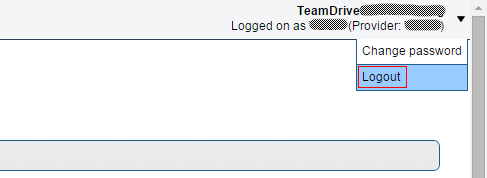
To log out, click the Logout button in the top right hand corner of any of the console pages.
Changing the Login Password
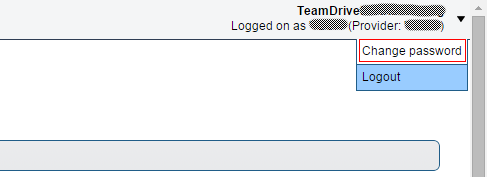
To change the password for the account you are currently logged in with, click on the Change Password button in the top right-hand corner oft the screen, next to the Logout button.
You will see a form prompting you to enter your current password and a new one. Since the password is hidden, you are required to enter it twice, to ensure you have entered it correctly.
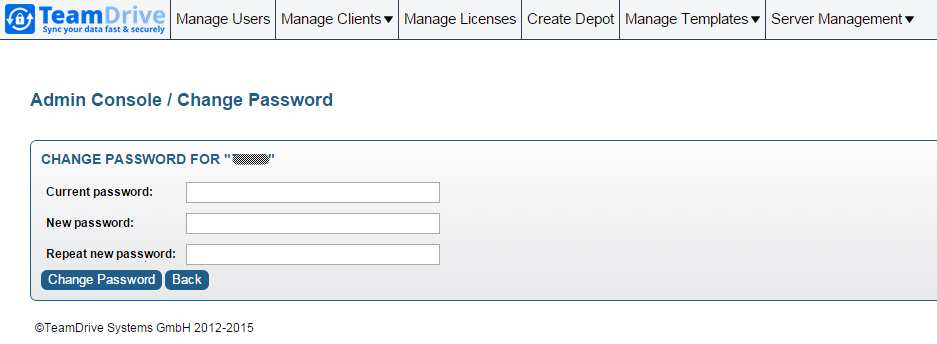
Once you have entered the current and new password, click Change Password to save the change, or click Back at any time to go back to the previous page.
Managing Users
Providers have administrative privileges to manage all users associated with their provider code. If you log in as a Provider user, you will be able to create/delete/edit user records belonging to that Provider, as well as manage various additional provider specific settings. When logging in as the default Provider, you are able to manage all users as well as all provider settings.
To list users belonging to you, click Manage Users.

By default, all users are listed. You can narrow down the search by typing in search criteria in the Filter Table section at the top of the page, and then clicking Apply Filter.

Click Clear Filter at any time to go back to displaying all available users.
When filtering results, you can use the percent character (‘%’) as a
wildcard: for example, entering ‘john%smith‘ into the email field
will match users with an email like john.smith@td.net,
johnsmith@shaw.net, johnDoeSmith@gmail.com, etc.

Depending on the number of results, there may be more than one page of output. Click the numbers and arrows above the table to browse through results. To sort the table by a column value, click the column’s name in the title row.
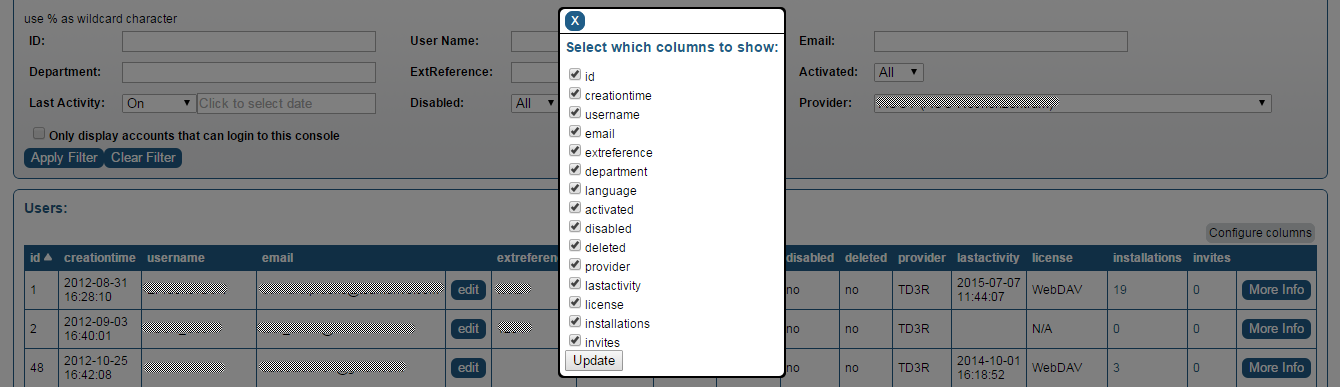
Click Configure Columns to bring up a dialogue that allows you to customize the table output. Select the columns that should be displayed and click Update to update the table view.
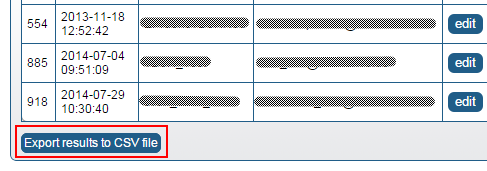
Click Export results to CSV file at the bottom of the result list if you want to save the resulting table output into a comma-separated text file. Your web browser will prompt you for a file name under which the file will be stored locally.
Click the More Info button at the end of a user’s row of information to view the user’s licence and device details. Click Less Info to hide this information again.
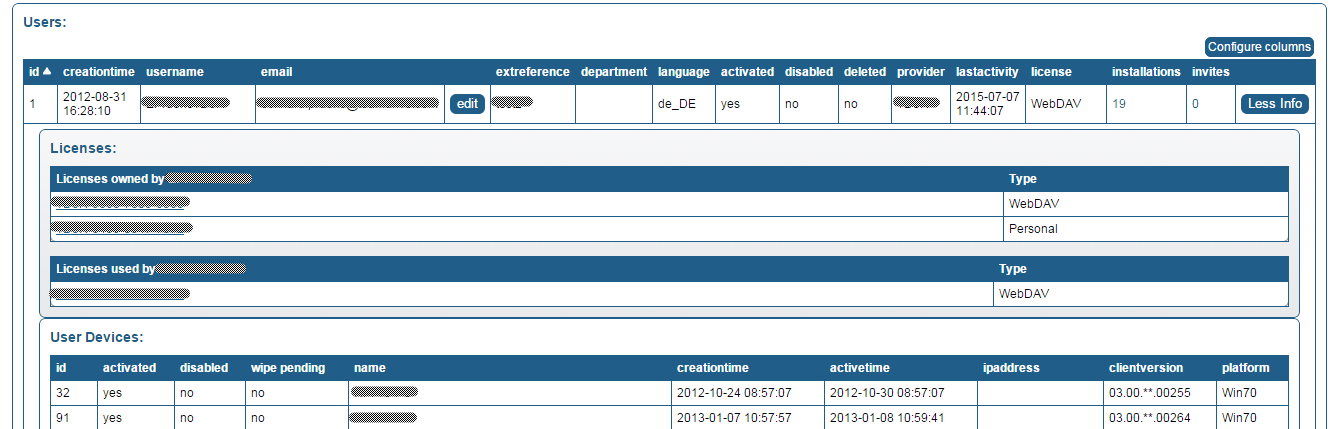
Click the Edit button next to a user’s email address to open up the user details page, which displays all of the user’s information, including licences and the user’s devices in more detail.

The user details page is divided into several blocks and will show user information about:
- Devices
- Licences
- Storage depots
- User rights
- User data
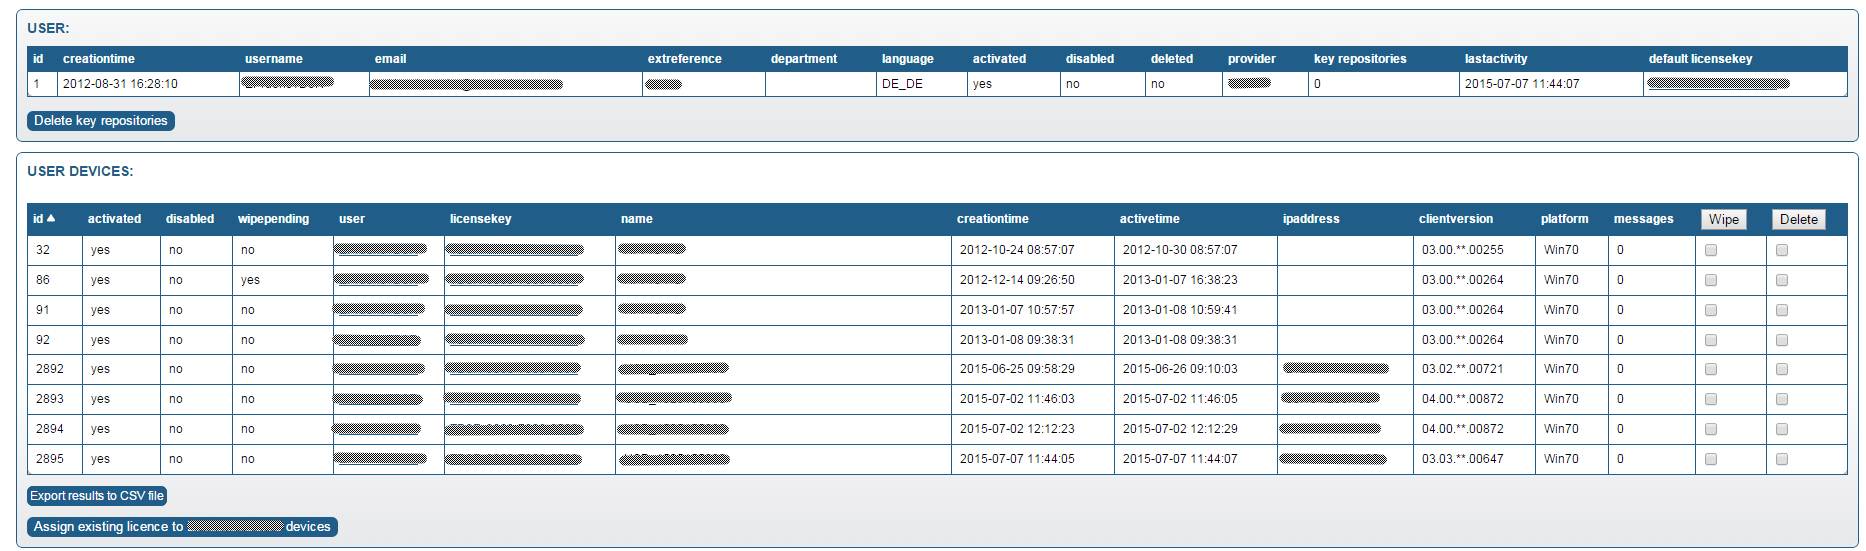
Devices
The device list shows information about all of the user’s installed TeamDrive Clients with details about the used licence key, the creation and last active time, IP address at the time of the creation, the Client version, platform and pending messages from other users. Clicking the message number (if the value is greater than zero) displays a list of users that sent messages to this device.
Please note that it is normal for inactive devices to have pending messages, these messages will be picked up when the device becomes active again.
Devices will stop receiving new messages after their active time has been
reached (defined in the global InviteOldDevicesPeriodActive configuration
setting). Messages will be automatically deleted once the message store time
is reached (defined in the global InvitationStoragePeriod configuration
setting).
You can delete one or multiple devices by checking the Delete checklist item for the device(s) in the User Devices section and clicking the Delete button on top of the column.
Note
A deleted device can be re-activated by the user. If you don’t want the user to re-activate his installation, you have to deactivate the user’s account.
The Wipe Device functionality deletes the Device’s entry in the Registration Server’ database after the Client confimed that all local data were deleted successfully (Space directories, caches, registration information).
Licences
This block is divided into two parts.

The first list shows licences owned by the user. By default, each user has at least one default licence.
If the licence limit is greater than one, more than one user can use the same licence key until the defined licence limit is reached.
Clicking a licence key will switch to the licence overview page. The Edit button will directly switch to the licence modification menu. See Manage Licences for more details.
Clicking Unassign <user> from licence removes the reference between the user and the license key. The key will still exist and can be assigned to another user. Clicking Assign existing licence to <user> allows you to assign an additional unassigned license key to the current user.
An overlay dialogue will be displayed:
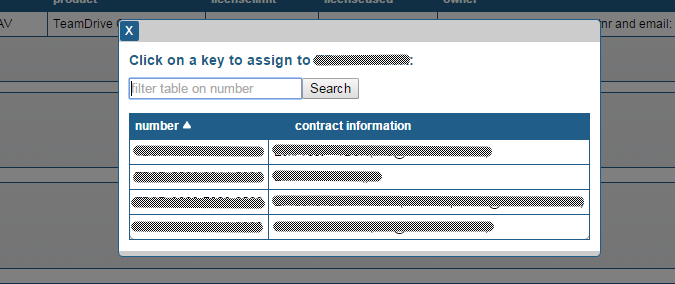
By clicking on an entry, the licence will be assigned to the selected user.
The licence fields Contractnumber and Email will be filled with the
selected user data.
The second block is only visible if the user is using a licence which belongs to another licence owner. A licence can also have no owner reference.
Clicking Create new licence for ... will open the licence creation page. See Creating Licences for details.
Space Depots

If the user has Space Depots on TeamDrive Host Servers (e.g. the default depot), the Depot information will be displayed. The first Depot usually is the default Depot (if configured), which is marked grey. If the user has additional Depots on other host servers, they will be listed here as well.
The Depot information for the user is retrieved from the Host Server via an API call. This only works if API communication to the Host Server is configured and enabled. It might take a few seconds to retrieve all Depot and Space information from the Host Server, please be patient until the table is loaded.
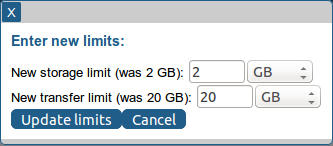
Clicking Change limits allows you to change the storage and transfer limits for a depot.
You can list all Spaces belonging to a Depot by clicking Show Spaces. Individual Spaces can be deleted as well, by clicking Delete Space in the respective table row.
An entire Depot including all Spaces can be deleted by clicking Delete Depot.
The button Deactivate Depot allows you to temporarily disable a user’s Space Depot on the Host Server. The user’s Clients will no longer be able to synchronize the Spaces contained in this Depot (the Spaces will be marked as “Disabled”), until you click Activate Depot again. This feature was added in version 3.0.018.4 of the Registration Server and requires version 3.0.013.8 (or later) of the Host Server.
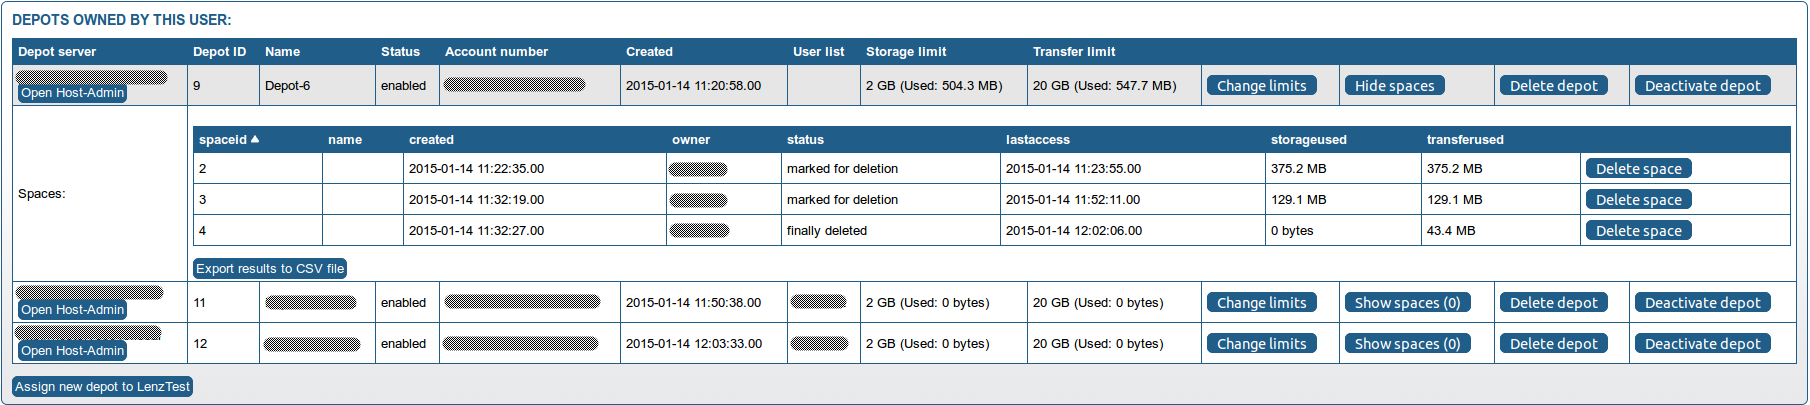
Clicking Assign new depot to ... brings up the Depot creation page. See Create Depot for more details.
Clicking Open Host Admin opens the respective TeamDrive Host Server’s administration console in a new browser window/tab. Please refer to the Host Server documentation for more information.
User Rights
Depending on what user you log in as, you have different rights and privileges.
When you log in as a Provider, you are granted a fixed set of rights depending on whether you are the default Provider or not. The default Provider is granted all rights, and therefore has administrative access to all records and settings belonging to any other Provider.
A regular Provider is granted all rights except for the following Super admin rights:
HAS_EDIT_SETTINGS_RIGHTSHAS_MANAGE_SERVERS_RIGHTSHAS_MANAGE_TASKS_RIGHTSHAS_VIEW_ALL_RECORDS_RIGHTSHAS_VIEW_SERVER_LOGS_RIGHTS
This means that regular Providers have administrative access to all records associated with their account, but can not edit records belonging to other Providers, or change settings that affect all Providers.
Providers can enable access to the Administration Console for selected users and grant them individual rights.
To grant/revoke user privileges, find the user you wish to modify in the list
and click edit (this requires the HAS_EDIT_USER_RIGHTS privilege).
On the user editing page, you will see a panel titled User Rights
(you will only see this section if you have HAS_GRANT_PRIVILEGES_RIGHTS)
Initially, there is only an unchecked checkbox labeled User has permission to log in to this console. Unless the box is checked, this user cannot log into the console.
Checking the box enables the HAS_LOGIN_RIGHTS privilege, which allows this
user to log into the Administration Console using his username and password.
After the box is checked, a list of additional available rights will be displayed. The rights that are shown depend on your own privileges — you can only grant/revoke rights that you possess yourself.
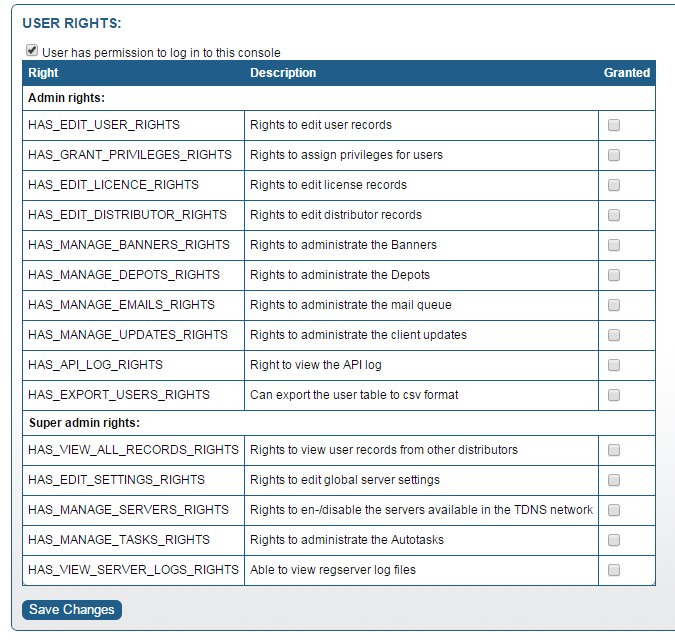
The user’s privileges can be defined individually by checking any of the following Admin rights:
HAS_EDIT_USER_RIGHTS- The user can view/edit/delete/create user accounts, can view/delete user device records and can upload CSV files (to import user records). See Managing Users for details.
HAS_GRANT_PRIVILEGES_RIGHTS- The user is able to modify the permissions of other users (note that even with this right, users can only grant/revoke rights that they have themselves).
HAS_EDIT_LICENCE_RIGHTS- Means that this user can create/edit licences via the Manage Licences page (which is only available if licence management is enabled for this Registration Server). See Manage Licences for details.
HAS_EDIT_DISTRIBUTOR_RIGHTS- With this right, a user can edit the custom settings associated with this Provider (the Edit Provider Settings menu). See Editing Provider Settings for details.
HAS_MANAGE_BANNERS_RIGHTS- User can access the Manage Banners page. See Managing Banners for details.
HAS_MANAGE_DEPOTS_RIGHTS- User can access the Create Depot page and view / edit existing depots. See Create Depot for details.
HAS_MANAGE_EMAILS_RIGHTS- User can access the Manage Emails page to administer the email out queue. See View Mail Queue for details.
HAS_MANAGE_UPDATES_RIGHTS- User can access the Manage Updates page. See Manage Client Updates for details.
HAS_API_LOG_RIGHTS- User can access the View API Log page. See View API Log for details.
HAS_EXPORT_USERS_RIGHTS- User can export the user table to csv fromat.
And the following Super admin rights:
HAS_VIEW_ALL_RECORDS_RIGHTS- Indicates that this user can view/edit records that are associated with other providers. For example: with this privilege, a user belonging to provider D1 would be able to create/delete/edit users belonging to Provider D2. By default, only the default Provider has this privilege.
HAS_EDIT_SETTINGS_RIGHTS- This means that the user can edit server-wide settings (the Edit Settings menu). By default, only the default Provider has this privilege. See Registration Server Settings for details.
HAS_MANAGE_SERVERS_RIGHTS- The user has access to the Manage Servers page where he can en-/disable communication between the own registration server and all other servers available in the TDNS network. See Manage Servers for details.
HAS_MANAGE_TASKS_RIGHTS- User can access the Manage Auto Tasks page. See Manage Auto Tasks for details.
HAS_VIEW_SERVER_LOGS_RIGHTS- User can access the View Server Logs page. See View Server Logs for details.
Check the desired privileges you want to assign to this user and click Save Changes to apply the changes.
User Data
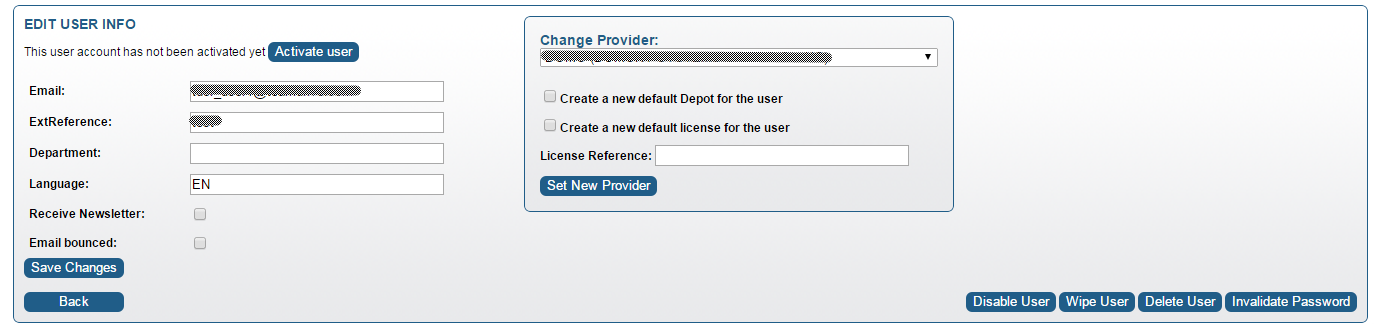
If a newly registered user has not activated his account yet (activated is set to no in the user’s details), you can activate the user’s account manually by clicking Activate user. If the user’s account was already activated, this option will not be displayed.
You can view and change the user’s details like email address, set a reference, department or the preferred language. Click Save Changes to commit any changes you made to these fields.
You can move the user to a different provider (only possible for the default provider) by clicking Set New Provider. You can define if the user will get a new depot and license based on the new provider default settings.
You can move the user to a different provider (only possible for the default provider) by clicking Set New Provider. You can define if the user will get a new depot and license based on the new provider default settings.
You can temporarily disable a user’s account by clicking Disable User. If you disable a user, the user’s Clients will receive a notification from the Registration Server and will inform the user about the account deactivation. At this point the Client disables all functionality and activity and the user can no longer use the TeamDrive service (e.g. creating Spaces, inviting users, etc.) until the account has been enabled again (access to the spaces in the filesystem is still possible).
Clicking Wipe User will wipe all of the user’s devices, delete the user’s key repositories, and disable the user. The devices of the user will delete all local data (Space directories, caches, registration information) and will delete itself on the in the Registration Server’ database. Licences and Space Depots will be preserved.

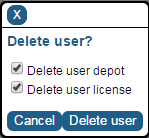
Clicking Delete User will delete the user record and all of the user’s devices. Additionally, you can choose to delete the user’s Space Depots and licences by selecting the appropriate checkboxes in the confirmation dialogue.
You can reset a user’s password by clicking Invalidate Password in the bottom right-hand corner. The user’s Client will perform an automatic logout and ask the user to request a new temporary password which must be used to define an own new password.
Return to the main user list at any time by clicking Back in the bottom left-hand corner.
Adding Users Manually
To add a new user, click Create new user at the top of the Manage Users page.

This brings up a form where you can enter the new user’s details. Click Create user when you are done, or Back to cancel the operation and return to the user management page.

In case you are logged in as the default Provider, you will see a drop-down menu allowing you to specify the Provider that this user will belong to. A regular Provider can only create users for his own account.
Note
Note that usernames need to be unique, not just locally, but across the TDNS if your Registration Server is connected to the TDNS. If you enter an username that is already registered on another Registration Server, the Administration Console will return an error.
You can either specify a password by deactivating Request password on first login, or have the user request a temporary password upon first log in (the default).
Adding Users via CSV File Import
In addition to adding users manually, you can automatically create multiple user accounts by importing them via CSV files (which could have been created by extracting the user data from another directory service or user account source).
This requires that CSV import is enabled and configured correctly in the provider settings. See chapter Importing User Accounts via CSV Files for more details on the configuration of the CSV import functionality and the structure of the CSV file.
To upload a CSV user list via the Administration Console, go to the user
management page and click Upload CSV file in the top left-hand corner
(Your user account needs to have the HAS_EDIT_USER_RIGHTS privilege to
have access to this page).

A file selection dialogue will pop up, allowing you to select a local CSV file to upload. Select a file and click Open. After the upload has finished, you will see a page that confirms if the upload was successful or if any errors occurred. Click Back to return to the user management page.
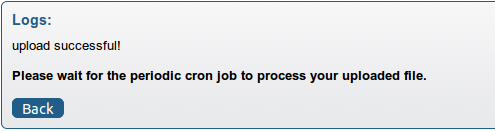
The users defined in the CSV file will be added or updated the next time the import script runs.
Downloading CSV Import Logs
When data is imported from a CSV file, an import log is created. This log contains information about the success/failure of the import.
Navigate to the Server Management / CSV User imports section to view a list of all uploaded CSV files, their status and the log output of the previous import run.

A page will come up that lists available logs. Each uploaded file can be downloaded again by clicking Download CSV. The status of each log indicates whether the import was successful, and at what time the log was created and processed. Click Download Success or Download Error to download a log of the successful or failed import. Click Delete to remove CSV files.

Click Back to return to the user management page.
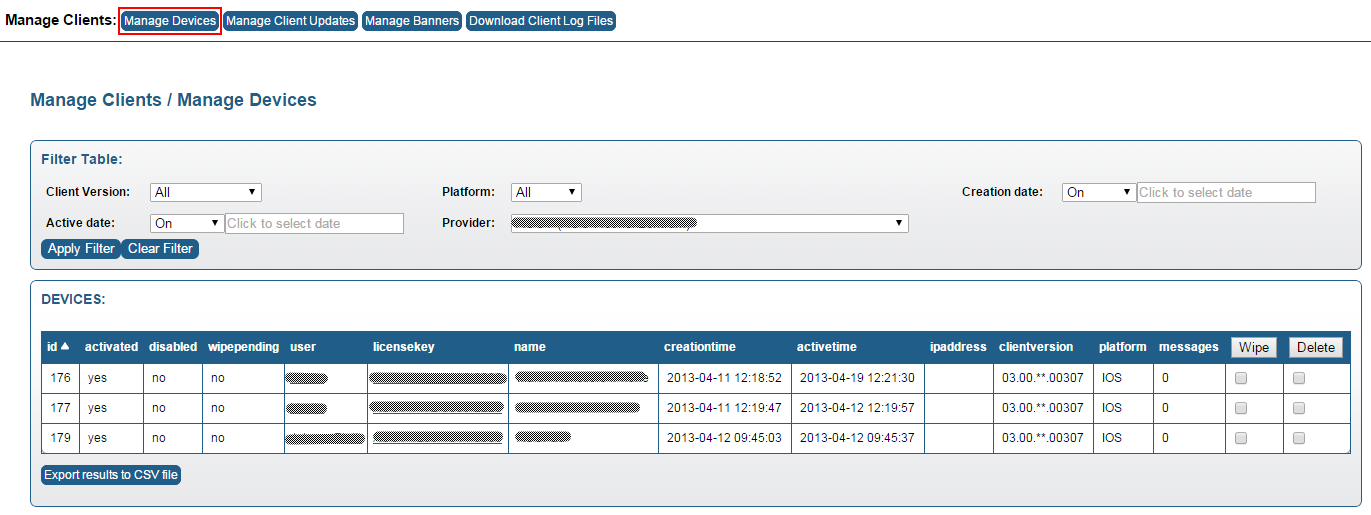
Manage Clients
This section allows administrate all client related tasks, like manage Devices, Client Updates, Banners and Download Client Log Files.

Managing Devices
The Manage Devices menu provides a user independent view of all Client installations. Different filters can be defined to limit the results, e.g. by Client version, OS platform or last active date. If you are logged in as the default provider, you can restrict the result list to only display a single provider’s devices, too.
You can wipe or delete multiple devices by checking the respective devices and clicking the Wipe or Delete button on top of the column.
The result set can also be exported as a CSV file by clicking Export results to CSV file on the bottom of the table.
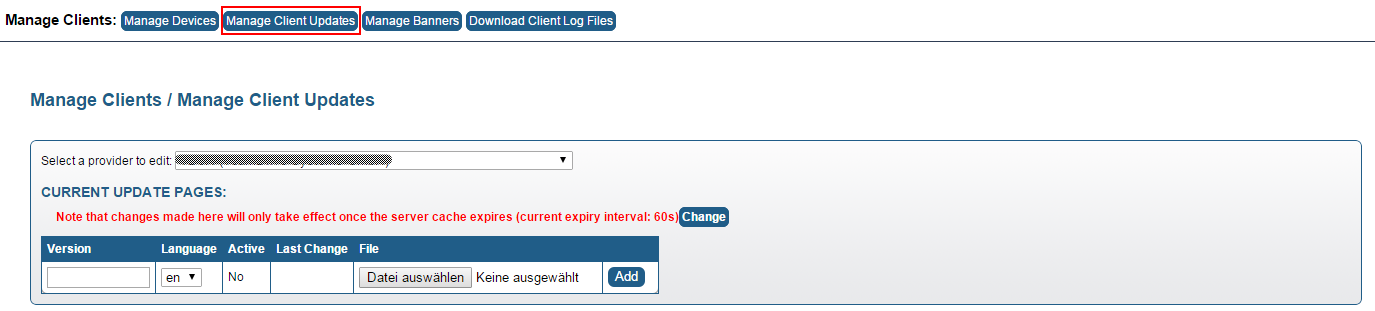
Manage Client Updates
To inform your users about the availability of a new version of the TeamDrive Client, you can utilize the “update notification” feature. These update notifications will only be displayed in the desktop clients and consist of HTML pages including the release notes and other update related information.
This feature can be activated and configured in the Manage Client Updates menu.
The default provider can create update notifications for any other provider record by selecting the desired Provider from the selection list on top of the page.
The admin console supports separate updates for TeamDrive 3 and 4.
For TeamDrive 3 client update notifications: You need to prepare HTML pages (with embedded CSS) that contain the notification text in advance, one for every language.
In both cases you have to upload the default update language of your available
update languages in the “Provider Settings” (as defined in
UPDATE/UPDATE_DEFAULT_LANG).
For TeamDrive 4 client update notifications: You could leave the HTML pages empty, only the version number is important. The TeamDrive 4 client could not display HTML pages. It will only show up, that a newer version exists.
For TeamDrive 4 client update notifications: You could leave the HTML pages empty, only the version number is important. The TeamDrive 4 client could not display HTML pages. It will only show up, that a newer version exists.
You can start by downloading the following template files as the basis:
http://static.teamdrive.com/downloads/update_notification_en.html (English Update Template)
http://static.teamdrive.com/downloads/update_notification_de.html (German Update Template)
If you don’t have prior knowledge of creating HTML and CSS, here are some useful hints for customizing these templates:
- Open the files with any (pure) text editor
- Ignore most of the top and scroll down to the bottom
- Don’t change any of the “HTML commands (tags)”. A tag is everything that is in between < and >
- Replace all the placeholder text with your update notification (headlines and new/changed features in the list)
- If you want to change the text sizes and colors you can specify them in CSS under the “User-definable settings”
Note
Don’t change the encoding type and leave it at UTF-8. Special Unicode
characters like e.g. German Umlauts must not be encoded to HTML entities. So
leave all the äöüß as they are and don’t use ä, ö,
ü or ß.
The Version field defines the new version number you want your users to update to. The number must be provided in the form of <major>.<minor>.<maint>.<build> e.g. “3.2.2.900”.
The Active field defines whether the update notification is on, off or
only be shown to a selected test user. You can specify a test user which will
receive the notification every time he logs on by entering the user name in
the provider setting UPDATE/UPDATE_TEST_USER.
Upload a file by selecting the local file name and clicking Add. After the HTML file has been uploaded, you can see a preview by clicking View. To upload a new version of the page, click Upload. You can obtain a copy of the page by clicking Download. To remove the page, click Delete.
By default, uploaded notifications are inactive. To test the notifications with your test user first, change Active to Test. If your tests are successful, change Active to Yes, which will trigger the update notifications for all languages of that version to be activated and displayed for all your users after the server cache has been refreshed.
Clicking Update in the TeamDrive Client update notification window will open a specified download page in the user’s local web browser.
The URL of this download page can be defined in the provider setting
REDIRECT/REDIRECT_DOWNLOAD. Usually it should point to the download
location where your users can obtain a new version of the TeamDrive Client,
e.g. http://www.yourdomain.com/download.html.
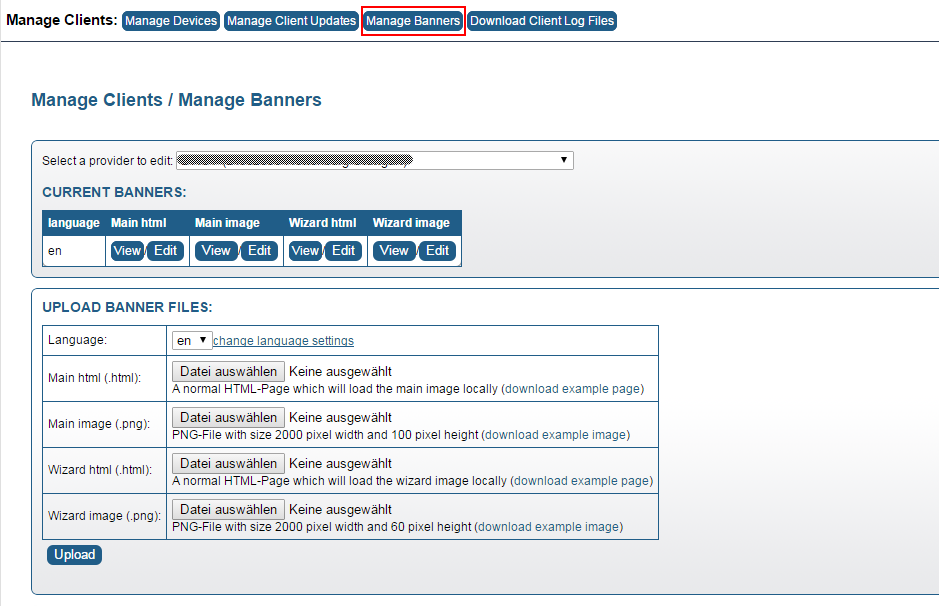
Managing Banners
The TeamDrive 3 desktop Client applications provide space at the bottom of the application window to display “Banner Ads” or other content (e.g. notifications, announcements, etc.). Additionally, a smaller banner can be displayed in the “Create Space” dialogue.
Banners are displayed by the Client if the license assigned to it includes the
“Banner Package”. This is the case for the default license that is created
automatically, unless you have defined a custom default license (e.g. by
changing the default value of DEFAULT_FREE_FEATURE or
DEFAULT_LICENSEKEY). The provider setting BANNER/BANNER_ENABLED must
be set to True.
Banners consist of static images and some surrounding HTML code that is
rendered by the Client’s embedded HTML rendering engine. You can customize
banners by clicking Manage Client / Manage Banners on the navigation bar.
You need to be logged in as the default provider or with a user account that has
the HAS_MANAGE_BANNERS_RIGHTS privilege.
As the default Provider, you can choose which Provider’s banners you want to manage by selecting the appropriate name from the selection list. As a regular provider, you can only edit and manage your own banners.
Banners are language-specific, you can define which languages you want to
support by adding the desired language codes (comma separated) to the provider
settings BANNER/BANNER_ALLOWED_LANG and BANNER/BANNER_DEFAULT_LANG.
Select the language you want to manage by selecting it from the Language
drop down list.
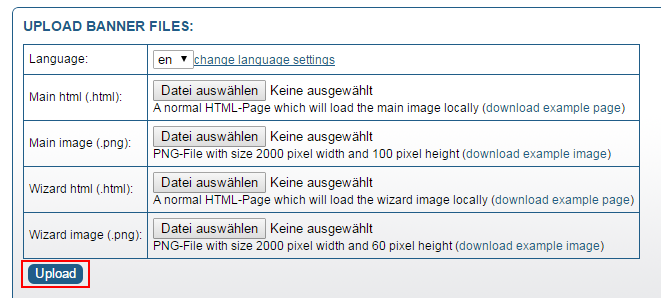
You need to create these HTML and PNG elements separately before uploading them to the Registration Server. You can download examples for each element from the Banner management page by clicking download example page/image.
Download and modify these to match your requirements. When done, select the appropriate file for each element in the Upload Banner Files block before clicking Upload to send the files to the Registration Server in one batch.
Repeat this upload steps until you have uploaded banners for all the languages you need to support.
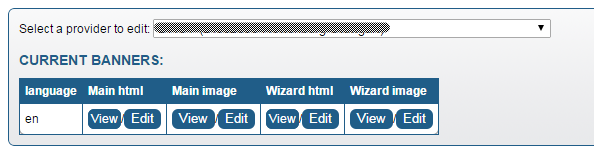
After you uploaded all banner elements for all languages, they will be listed in the Current Banners block of the page. Clicking View will display the current element (viewing the HTML code may result in what seems like an empty page). Clicking Edit will allow you to modify the code of the HTML elements and upload another version of the PNG image for the images.
Note
Note that new banners will only be displayed by the Clients after a restart.
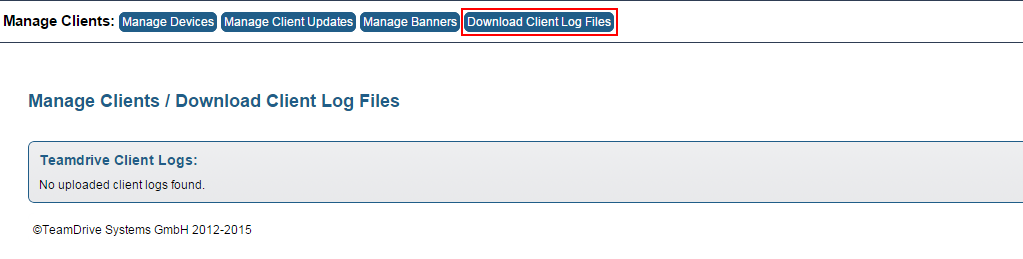
Client Log Files
The Admin Console allows downloading client log files for troubleshooting purposes.
Manage Licences
The menu is only visible if the provider setting LICENSE/ALLOW_MANAGE_LICENSE
is set to True. Users could only access the page having the
HAS_EDIT_LICENCE_RIGHTS privilege.
Each user receives a default licence when he registers a device. The feature
enabled for the default licence can be defined in the Provider settings
via the CLIENT/DEFAULT_FREE_FEATURE setting.
Instead of defining a default feature, it’s also possible to define a default
licence key which will be used by all users by entering the licence key in the
CLIENT/DEFAULT_LICENSEKEY setting.
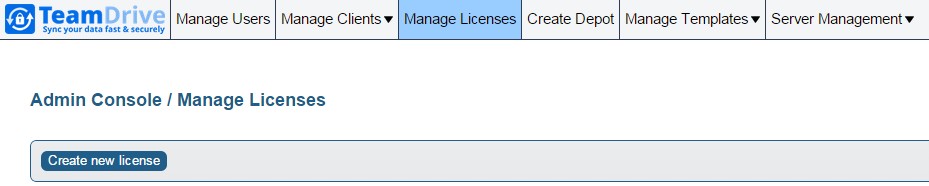
To manage licences, click Manage Licences in the top menu bar.
The table can be filtered in the same way that the user table can be filtered. Enter your search criteria in the Filter table form at the top of the page, click Apply Filter to apply your criteria. Click Clear Filter to return to the full table view.
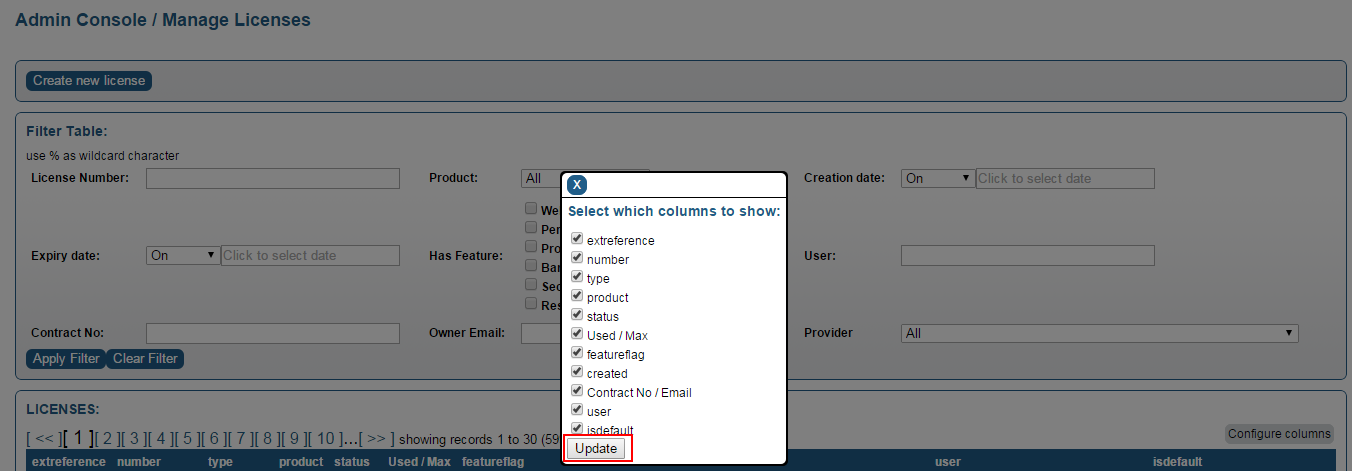
To customize the columns displayed, click Configure columns on the top right of the table. Select the desired columns and click Update to refresh the table view.
As with the user page, the search results may be displayed over several pages. To export the result set in a CSV file, click Export results to CSV file at the bottom of the table. This will bring up your browser’s file saving dialogue.
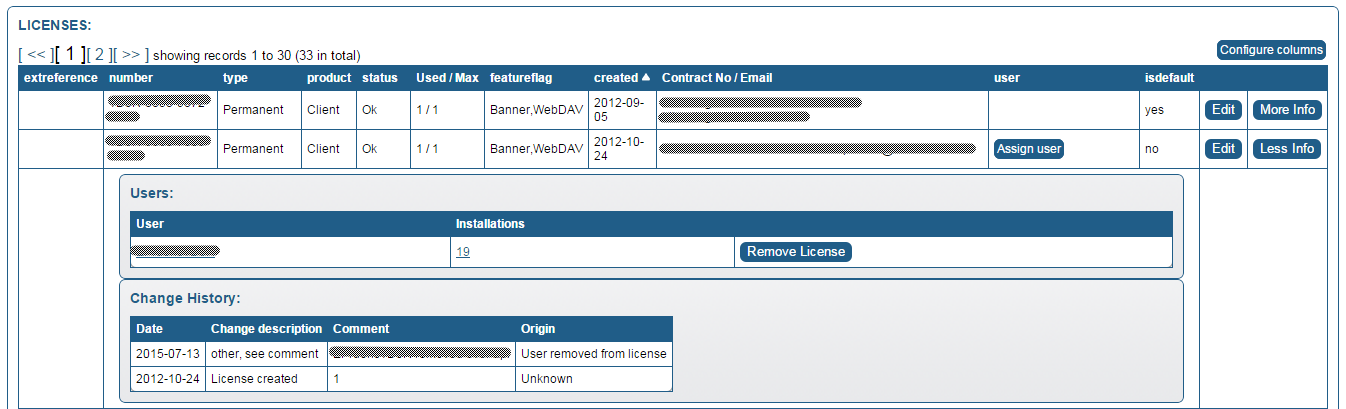
To display additional details about a licence, click More Info on the right side of the row. This will list all users this licence key has been assigned to as well as the change history of the licence. Click Less Info to hide these details again.
Editing Licences
To edit a licence, find the licence in the Licences table and click Edit.

This will bring up the licence editing menu:
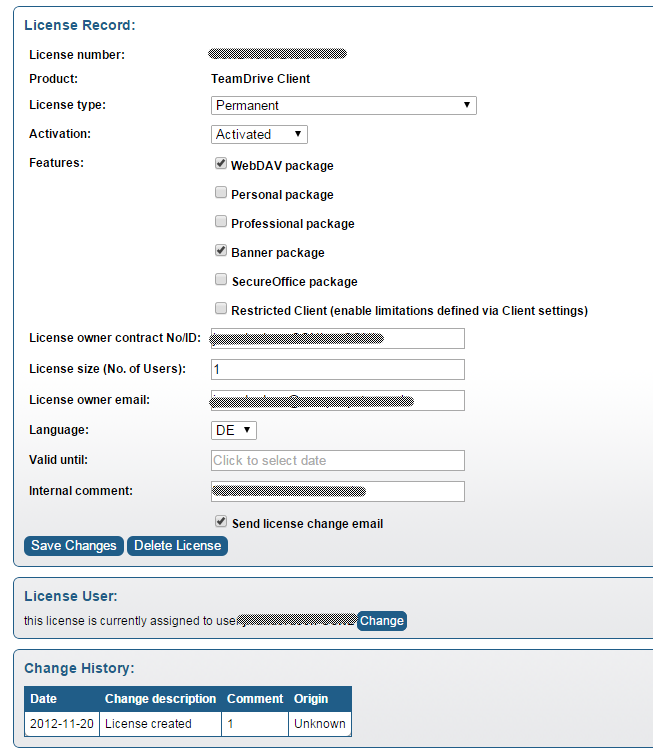
On this page, you can change various features of a licence, e.g. the Client features, number of users, owner, user as well as an expiry date.
Once you have finished making changes, click Save Changes to apply them. Delete a licence by clicking Delete license.
Each modification creates an entry in the licence’s Change History, which is displayed below the editing dialogue.
Creating Licences
For creating new licenses the provider setting
LICENSE/ALLOW_CREATE_LICENSE must be set to True.
To create a new licence, click Create new licence.
If you are logged in as the default provider, you will get a select list to choose a provider for which you would like to create a licence for. Otherwise you could only create licenses for yourself.
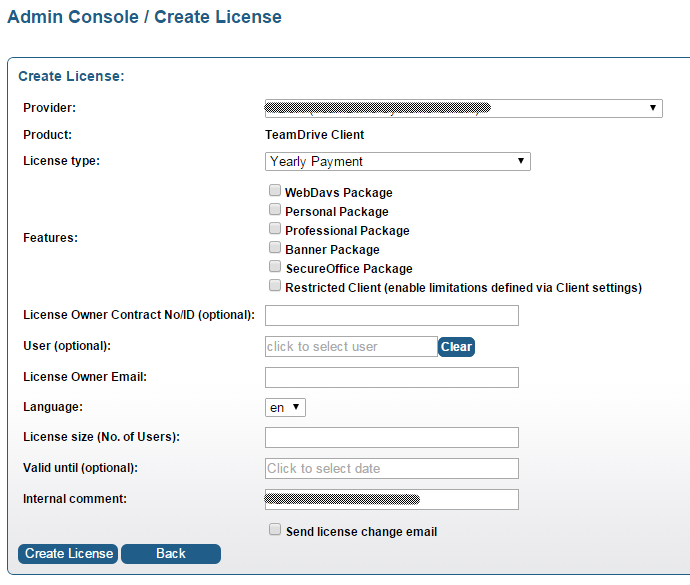
Customize terms and features of the licence according to your requirements.
You can assign this licence to a user by clicking click to select user and selecting a user name from the popup window. This is optional. A licence without a user reference is an unbound licence.
Click Create Licence to create it. Clicking Back will return to the licence overview page.
Create Depot
Every user usually receives a default Space depot, if this is enabled in the
provider settings (HOSTSERVER/HAS_DEFAULT_DEPOT must be set to True).
Click Create Depot to create new Space depots on a Host Server and assign them to selected users.
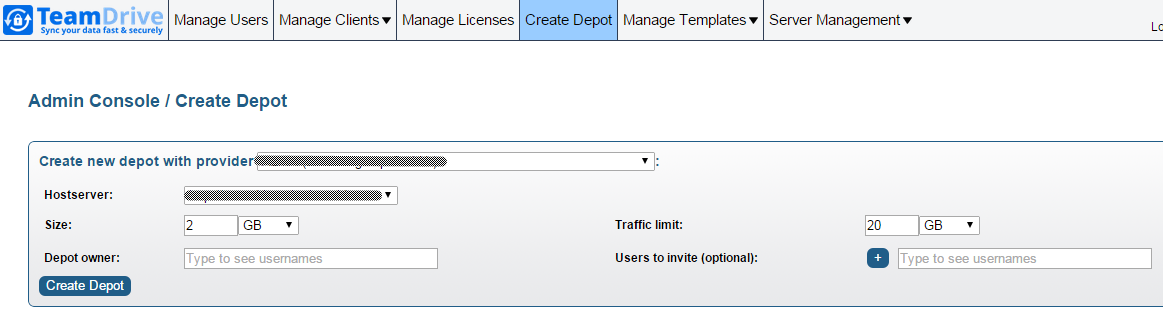
If there is more than one Host Server associated with your provider account,
you can choose the location of the Space Depot by selecting the Host Server
from a dropdown list all registered servers. Please set the provider settings
HOSTSERVER/AUTO_DISTRIBUTE_DEPOT to True to distribute more than the
default depot to new client installation.
Type in a letter in the Depot owner field to get a list of available user names. A select list below the field will show all matching user names.
You can define a Storage Limit by entering the desired amount in the input field. By default, the traffic limit will be set to 10 times the storage limit. If required, you can modify these limits later on via the user administration page as documented in chapter Space Depots.
It is possible to assign a Space depot to multiple users. Type in a letter in Users to invite field to get a select list with matching usernames. Click on the ‘+’-sign to add more users which should also be able to create Spaces in this Depot.
Click Create Depot to finalize the Depot creation.
The user’s Clients will automatically be notified about the additional Depot.
Manage Templates
You could manage the email and html templates. The email templates will be used to send out notification emails to your users. The html templates will be shown when clicking on activation links for confirm the activation or changing the email address.

Manage Email Templates
The Registration Server is shipped with the default set of email templates
located in /opt/teamdrive/regserver/setup/templates/email.
A new created provider will use the default templates from the file system.
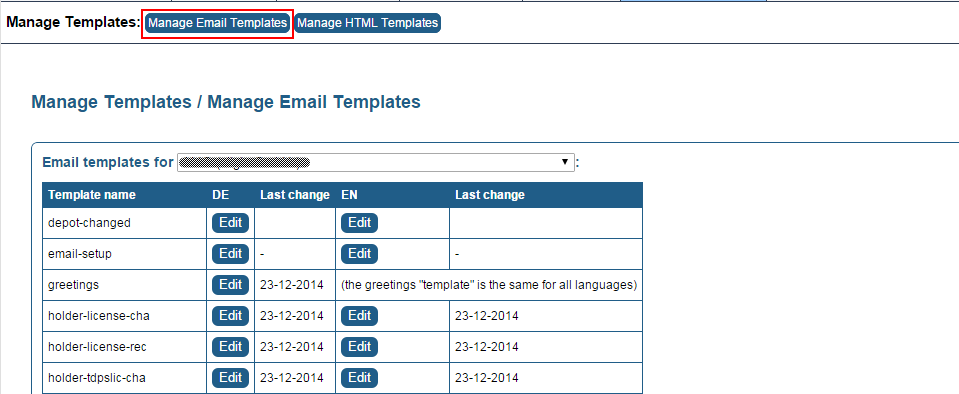
The templates are combined into groups for a better overview. A few groups
will be hidden by default, because they are not necessary in your case due
to your current settings. For example: The mail templates in the group
USER-INVITE-USER are only necessary, if you define a value for the
provider setting REFERRAL/PROMOTION_UPGRADE. Using the button Show
you could make the templates visible even you are not using them.
The templates are combined to the following groups:
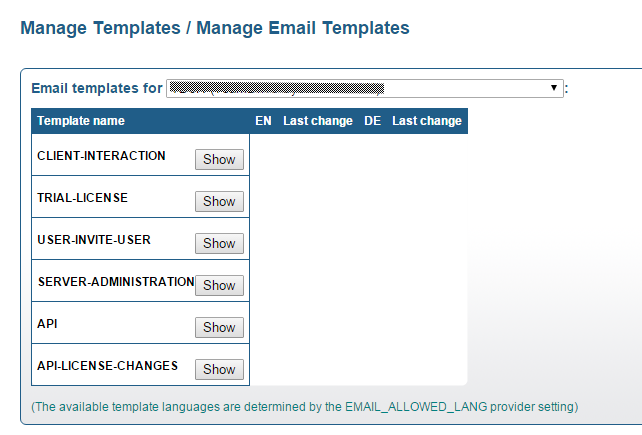
- CLIENT-INTERACTION: This is the default set of templates which are necessary in all cases. They are important for the client interaction like recieving the activation mail, sending invitation mails to other users and for password and email changes.
- TRIAL-LICENSE: Only necessary if you offer trial licenses to your users.
- USER-INVITE-USER: Only necessary if you offer a referral program for your users.
- SERVER-ADMINISTRATION: These templates will only be used for the server setup and two factor authentication in the admin console.
- API: Only necessary if you will offer an own web interface for your
users and you will use the Registration Server API to allow users to
register and manage their accounts. Will also be used by the adminconsole
in case of changing the email address or password. You have to allow
sending mails from the API using the provider setting
API/API_SEND_EMAIL - API-LICENSE-CHANGES: Only necessary if you use the API and you want to send confirmation mails for license creation and changes.
The provider could edit the default templates by clicking Edit next to each template to open it in an editor window. The templates are using macros which are placed into [[...]] and will be substituted by a value at the time when the template will be processed. You will find a list of all macros in the chapter Templates for Client actions in the TeamDrive Registration Server Reference Guide.
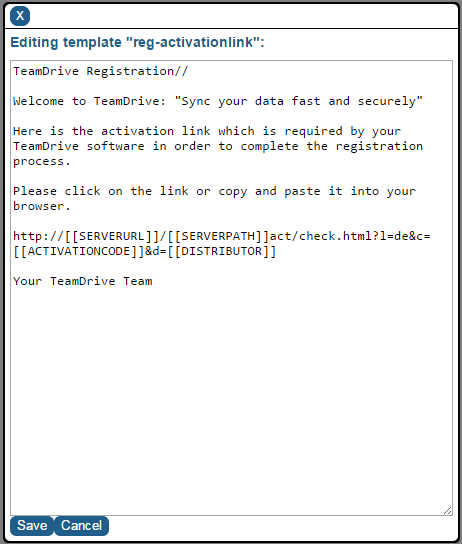
By saving the changes, the modified template will be stored in the database for this provider and the default template in the file system will not be used any more.
The templates are language specific. For each language you want to support
you have to create a set of email templates. The supported languages for the
mail templates will be defined in the provider setting EMAIL/EMAIL_ALLOWED_LANG.
Manage HTML Templates
The Registration Server is shipped with the default set of html templates
located in /opt/teamdrive/regserver/setup/templates/html.
For the html templates the Registration Server is using the same logic as for the email templates. A new created provider will use the default templates from the file system until the provider is changing one of the template. The modified version will be stored in the database.
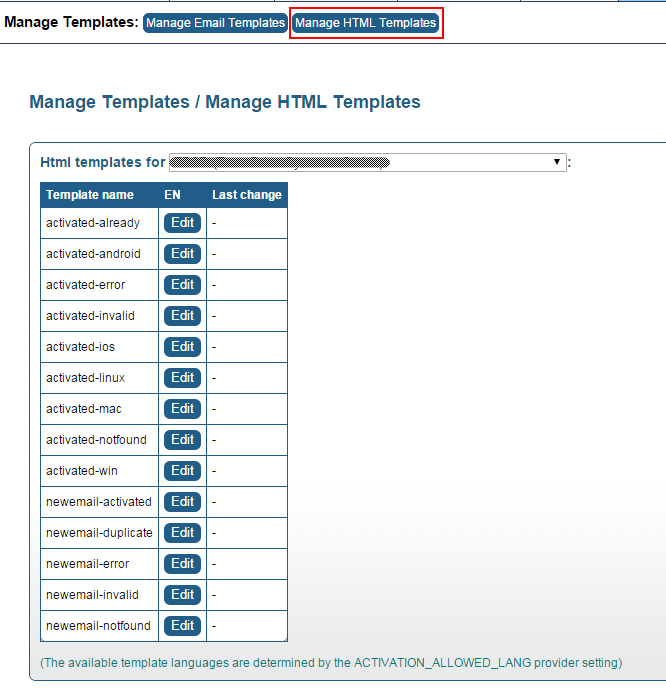
The html templates are language specific too. The supported languages for them
will be defined in the provider setting ACTIVATION/ACTIVATION_ALLOWED_LANG.
Server Management
This section allows administrate all Registration Server related configurations and the possibility to view several log files.

View Mail Queue
Click View mail queue to get an overview of the current mail queue, which lists all emails that have not been delivered to the respective users yet.
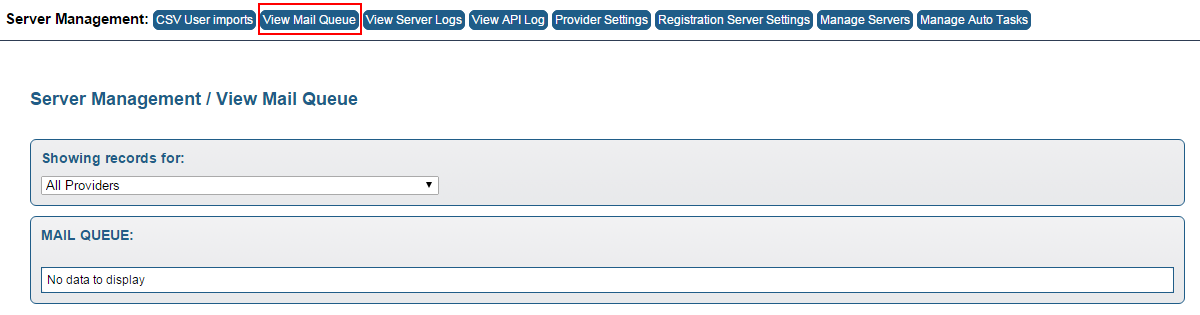
Pending outgoing emails can be shown here due to the fact that the “Send Emails” auto task hasn’t procesed the mail queue recently (such messages have the status “created”), or there were issues with the email address or when submitting messages to the MTA (the status of these messages is “failed”).
Click Reset Status to enqueue a message for delivery again. Click Delete to remove a message from the queue.
View Server Logs
The Admin Console allows viewing selected server log files for troubleshooting
purposes. The View Server Logs page is only visible for the Registration
Server’s default provider and any user having the
HAS_VIEW_SERVER_LOGS_RIGHTS privilege.
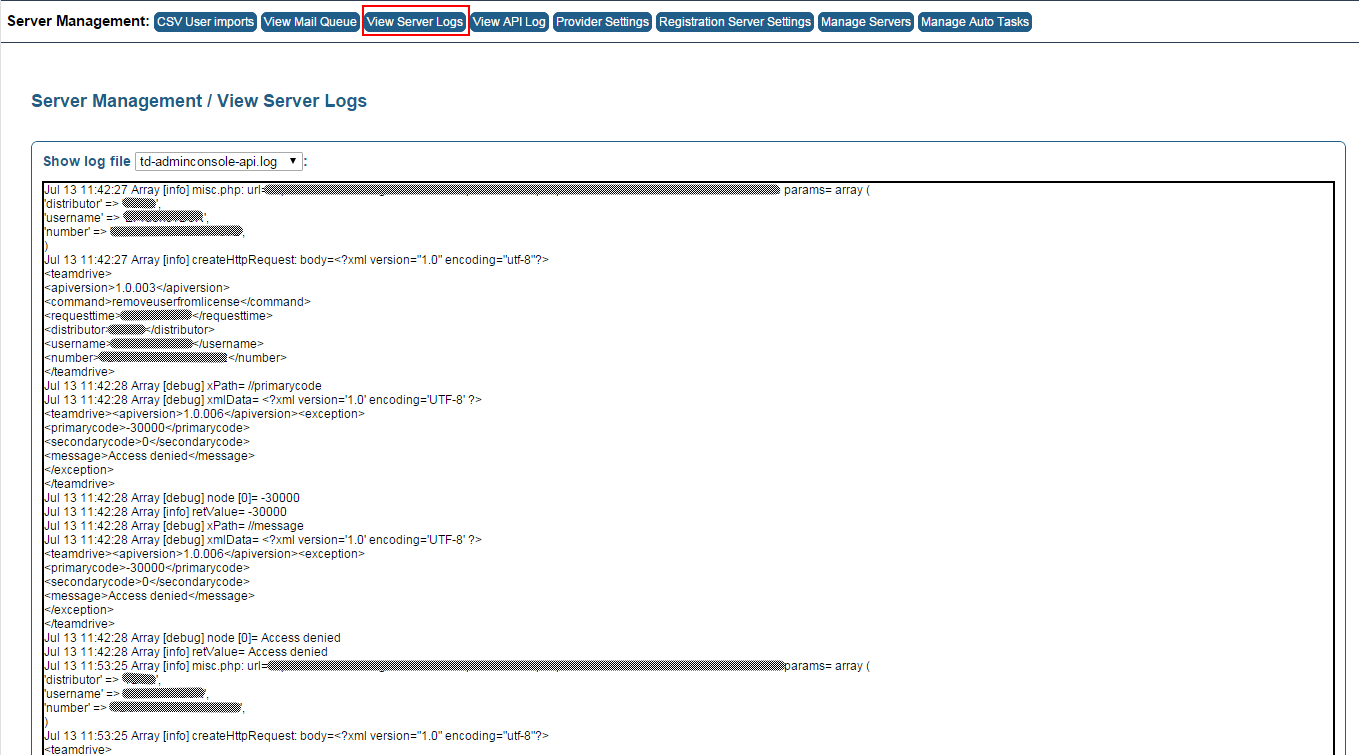
Depending on the availability and access permissions, the following log files can be viewed by selecting them from the selection list after Show log file:
/var/log/httpd/error_log/var/log/td-regserver.log/var/log/td-adminconsole-api.log/var/log/td-adminconsole-failedlogins.log
As it requires physical read access to these logs, this feature works best
when the Administration Console is installed on the same host where the
Registration Server instance is running on. Log files can only be viewed if
the user that the Apache HTTP Server is running under (usually apache) has
the required read access privileges to view these files.
The list of log files is defined in the (read-only) Reg Server setting
ServerLogFiles and can only be modified by updating the setting in the
database directly.
/var/log/httpd/error_log: It’s the standard apache error log file.
/var/log/td-regserver.log: The yvva background task will log errors into
this file and also the errors which might occur from the client requests will
be logged to this file.
/var/log/td-adminconsole-api.log: The API requests from the admin console to
the registration server API and host server API will be logged to this file.
/var/log/td-adminconsole-failedlogins.log: Failed logins to the admin console
will be logged to this file.
View API Log
Most of the tasks performed via the Administration Console result in API calls being sent to the Registration Server. You can also utilize API calls in your own applications, if you need to interact with the Registration Server.
See the chapter Registration Server API in the TeamDrive Registration Server Reference Guide for an overview of the available API calls.
If you enabled the logging in your provider setting API/API_REQUEST_LOGGING
and you are either logged in as the default provider or with a provider/user
account that has the HAS_API_LOG_RIGHTS privilege, you can view a log of
all incoming API requests and their results by clicking View API Log in
the menu bar.
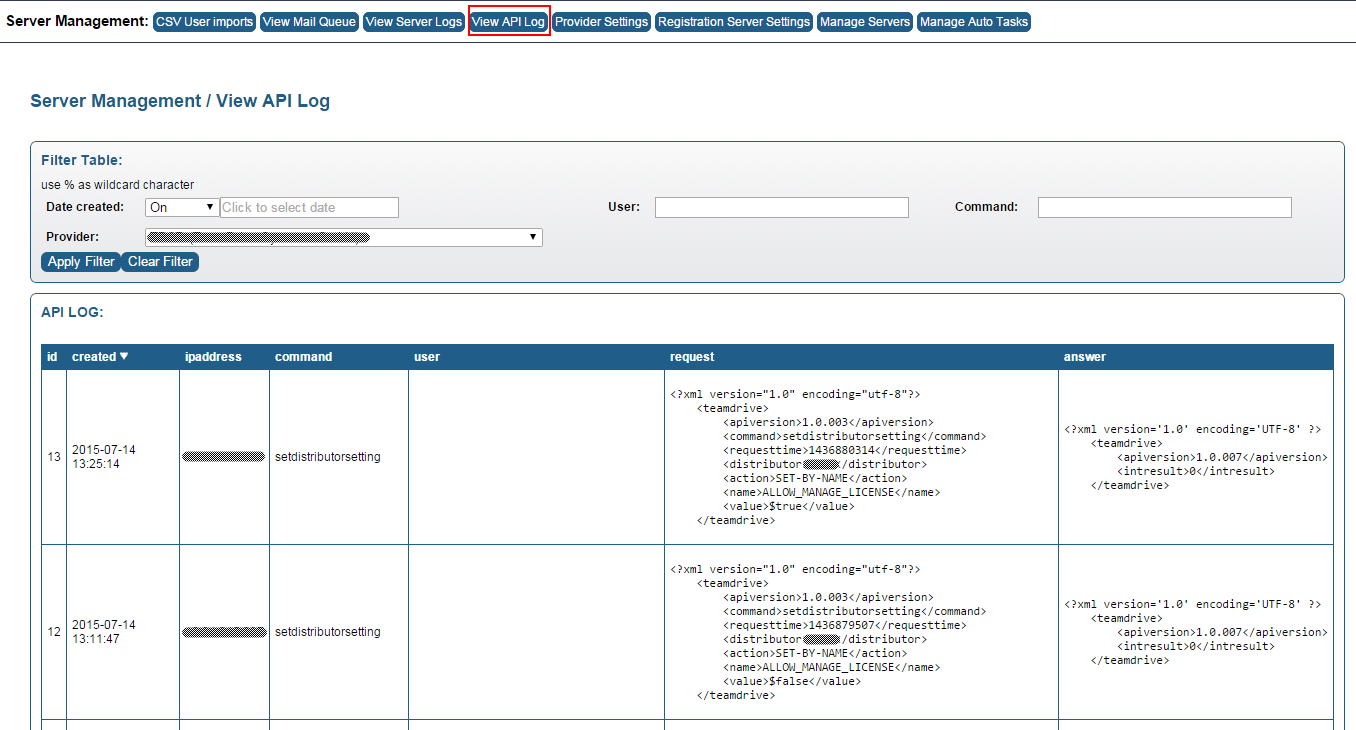
The API request log is stored in the Registration Server’s MySQL database and can be filtered by various criteria, e.g. Date created, User, and Command.
The default Provider is capable of viewing all API requests of all other Providers and can also apply a search filter by selecting a specific Provider name from the Provider dropdown menu. Regular Provider accounts can only view their own API requests.
Note
Note that enabling API logging by default will significantly contribute to
the growth of the Registration Server’s MySQL database. On a busy site, we
recommend to only enable API logging for debugging purposes or to enable the
CleanUp auto task that removes log entries older than 30 days from the
API log table. See Manage Auto Tasks for
details.
Provider Settings
There is a number of provider specific configuration options that can be customized based on your requiremements. To edit Provider settings, click Server Management/Provider Settings in the top menu bar.
The provider specific data is devided into to parts: the provider record with the basic provider informations and the individual settings for the provider to control the features and functionality of the Registration Server.
Warning
Changes to the Provider settings will only be active after the caching
period defined in RegServer/CacheIntervall has passed (the default is
1800 seconds or 30 minutes). If no cache interval was set, you need to
restart the Apache HTTP Server of the Registration Server to reload these
values.
Provider record
The top of the page provides a section that allows you to edit the Provider user details itself. Edit the values in the text fields and click Save Changes to make changes.

Depending on your privileges, you will also see an option at the very top of the page Select a Provider to edit. The page will display the values and settings for whichever Provider is selected in this box. A new provider could also be added by clicking on Add Provider.... By default, only the default Provider has access to these both options.
For adding a provider you need a valid and pre-registered provider code:
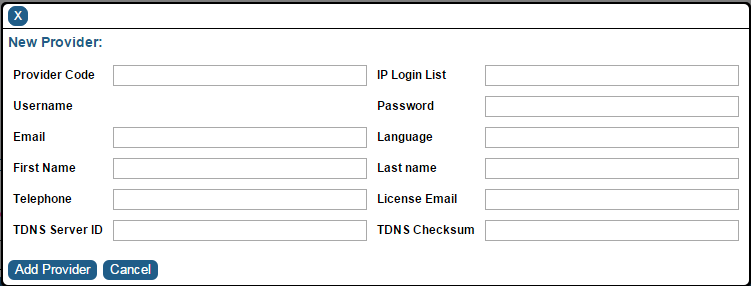
Please provide values for the following required fields: the provider code you recieved from TeamDrive Systems GmbH, username, password, language, first and last name, company name and sender email.
Telephone and IP Login List are optional fields.
In case that your Registration Server is part of TDNS, you have to fill in the TDNS Server ID and TDNS Checksum.
Editing Provider Settings
The lower section of the page shows list of customizable settings for the selected Provider, grouped in categories.
The available settings and their function are described in the Reference Guide.
To change a setting, select one of the categories (e.g. AUTHSERVICE, CLIENT, EMAIL or HOSTSERVER). The settings in each group are devided in two blocks:
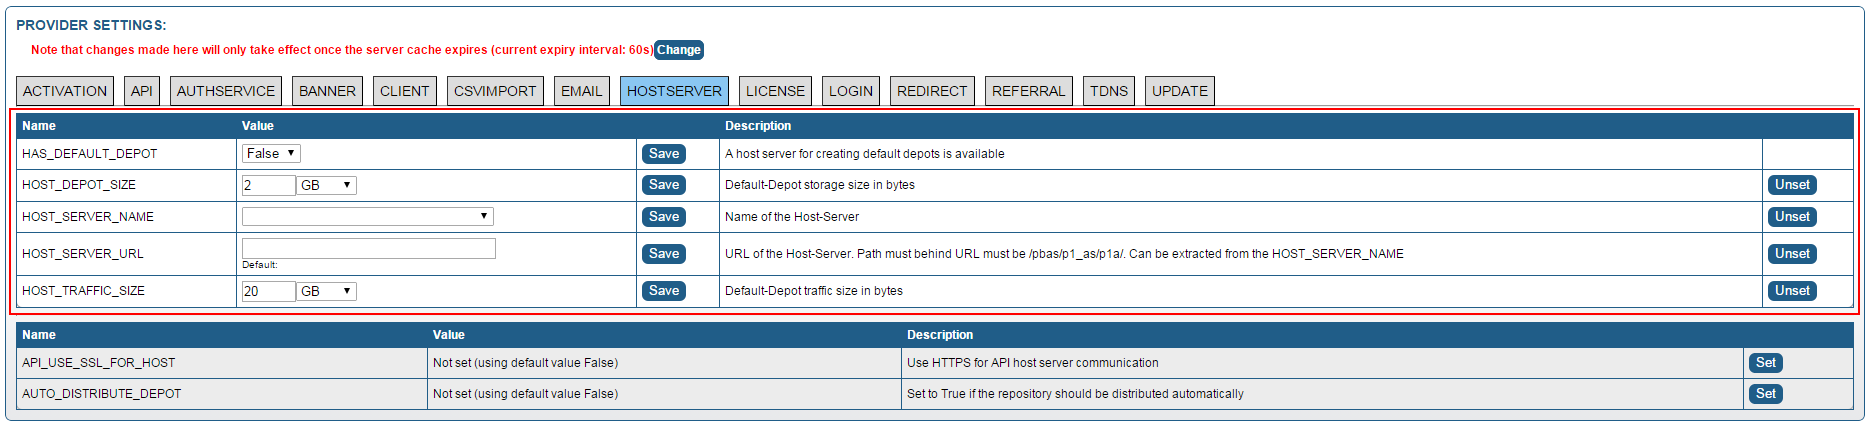
The upper white marked area with the settings which are added to the provider. Change the desired setting either by entering a new value or selecting one from the drop down menu, and click Save in that value’s row. Do not change more than one value at once — always save your change before modifiying another value. Note that not all settings are editable. To remove a setting click Unset. The entry will disappear from the upper list and could be found in the lower list now and the pre-defined default value will be used. Note that not all settings could be removed.
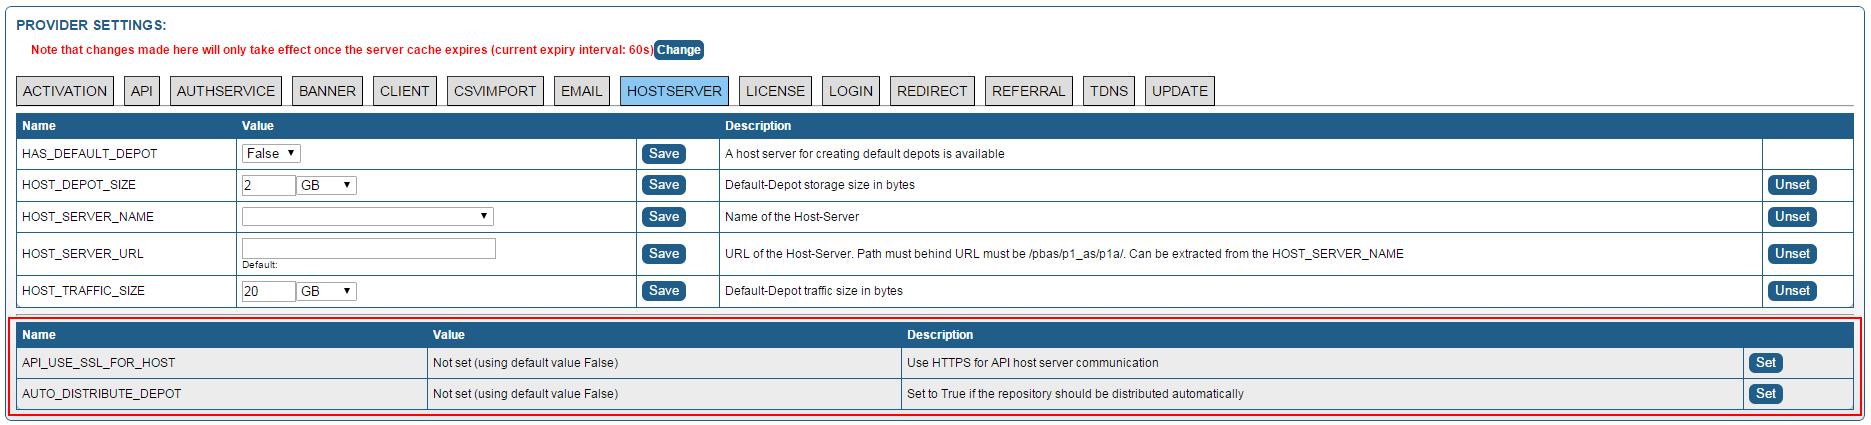
The lower grey marked area with additional settings which are not currently added to the provider and which will use the pre-defined default values. To change the default value, click on Set to add this setting for the provider and change the value as described above in the upper list. If you added all available settings, the grey marked box will disappear.
Manage Servers
Click Manage Servers in the navigation bar to perform some management tasks related to the Host Servers associated with your Registration Server and how your Registration Server communicates with other Registration Servers in the TeamDrive Network.
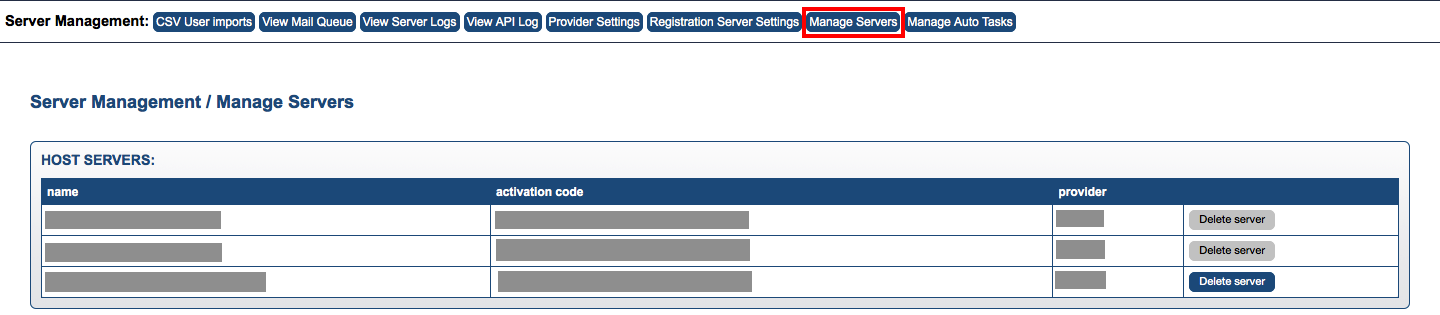
The Host Servers section lists all Host Servers that have been registered/associated with providers hosted on your Registration Server instance. From here you can also obtain the Activation Code that is required to finalize the Host Server installation and registration process (see the Team Drive Host Server Installation Guide for details). It’s also possible to remove a Host Server by clicking Delete Server, which detaches it from the provider account it has been registered with and deletes the corresponding user and device entry.
Note
Only a Host Server which is not already in use by clients can be deleted.
Important
Please enable HTTPS for the API communication between Registration Server
and Host Server in case that your Server is configured to allow HTTPS
communication (setting HostServer/API_USE_SSL_FOR_HOST).
If TDNS access is enabled (setting RegServer/TDNSEnabled), the Manage
Servers page also allows you to enable communication with other Registration
Servers.
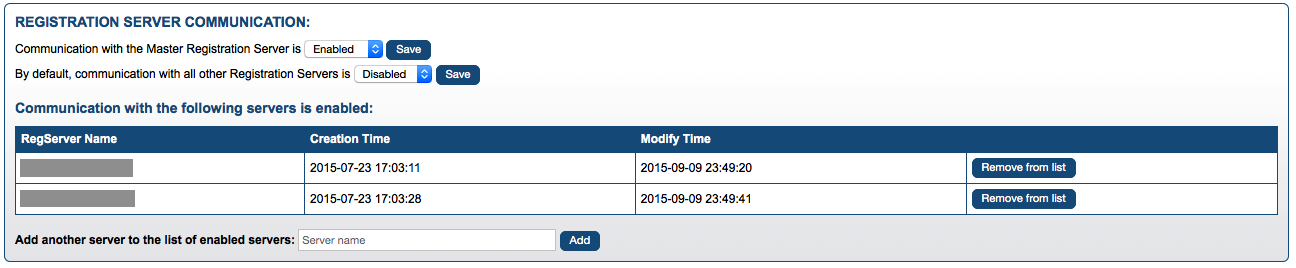
Enabling a Registration Server allows your local users to directly invite users managed on that other Registration Server into their Spaces.
By default, communication with all other servers is disabled/enabled according
to the RegServer/TDNSAutoWhiteList setting. This setting can either be changed
directly on the Server Management/Registration Server Settings page, or on the
Manage Servers page by changing the default to enabled/disabled and clicking
“Save”.
Note
The communication to TeamDriveMaster must always be enabled in case your are
using the TeamDrive standard client.
You can set exceptions to the current default rule by entering a specific server name in the form field at the bottom of the page and clicking “Add”. The current list of exceptions is displayed along with the the chosen default rule.
Another exception to the default is the Master Registration Server, which is enabled/disabled separately via the selection field at the top of this section of the page.
If communication with other servers is enabled by default, your Registration Server obtains a list of all known Registration Servers from the Master Registration Server “TeamDriveMaster” every 12 hours via a background task (see Manage Auto Tasks).
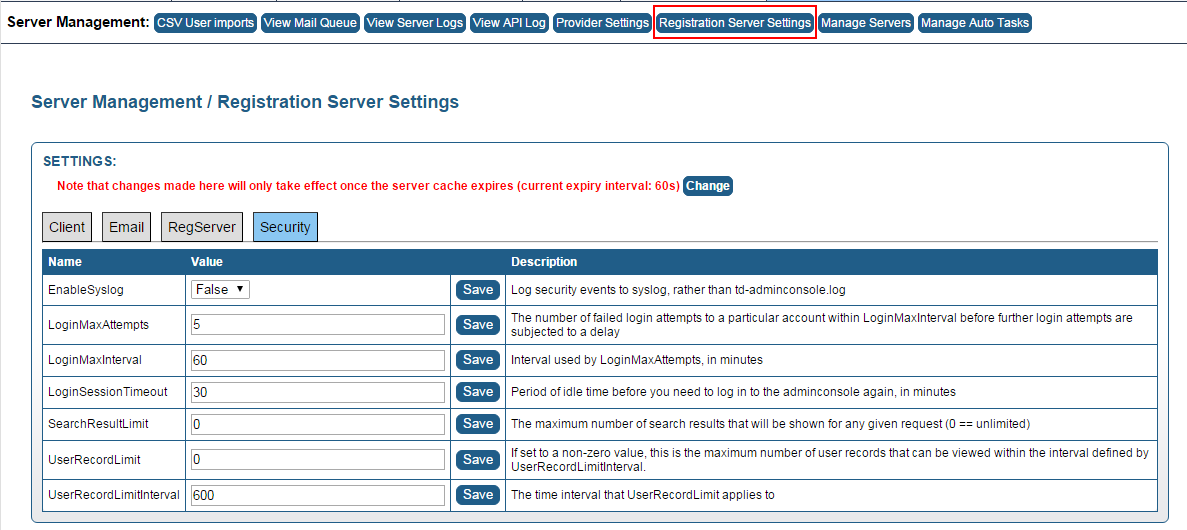
Registration Server Settings
By default, the Registration Server’s global settings can only be changed by the default provider. Click Server Management/Registration Server Settings in the navigation bar.
Warning
Changes to the Registration Server settings will only be active after the
caching period defined in RegServer/CacheIntervall has passed (the
default is 1800 seconds or 30 minutes). If no cache interval was set, you
need to restart the Apache HTTP Server of the Registration Server to reload
these values.
To change a setting, select one of the toplevel categories (e.g. Client or RegServer), change the desired setting either by entering a new value or selecting one from the drop down menu, and click Save in that value’s row. Do not change more than one value at once — always save your change before modifiying another value. Note that not all settings are editable.

Each setting provides a short description about its meaning. All settings and possible values are explained in more detail in the Reference Guide.
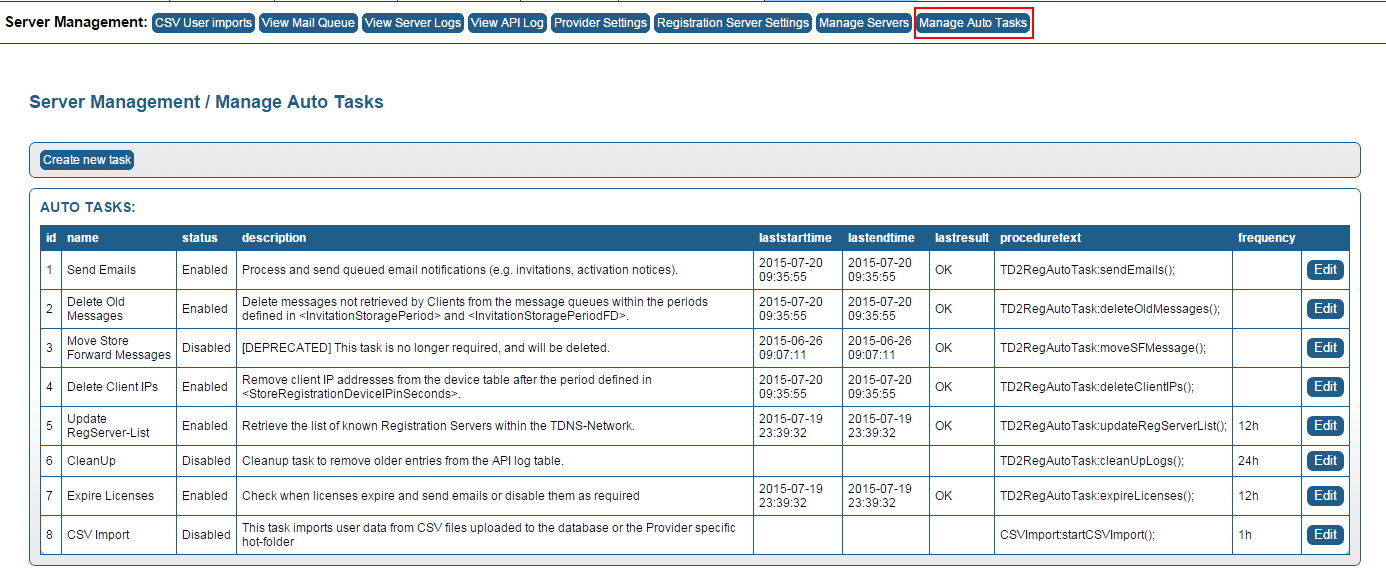
Manage Auto Tasks
There is a number of background jobs that are being performed by the
Yvva-based td-regserver service. The individual tasks are explained in
more detail in chapter Auto Tasks.
To review and configure these automatic tasks, click Server Management ->
Manage Auto Tasks in the top menu bar. Note that this option is only
available to the default provider and users having the
HAS_MANAGE_TASKS_RIGHTS privilege. In general it’s not necessary to
change the default values.
You will see a list of currently available tasks, their status and description as well as some run time information.
To edit a task, click Edit next to the desired task. You will see a form that allows you to enable or disable the task and modify some of the task’s parameters, e.g. the frequency in which this task will be called.
If no frequency is provided, the task is scheduled to run every time the
td-regserver background service wakes up (10 seconds by default, as
defined in file /etc/td-regserver.conf).
We do not recommend to change any other settings of existing tasks or to remove or disable the system’s default tasks.

After you are finished, click Save to save any changes you have made, or Back to return to the list of tasks.

To create a new task, click Create new task on top of the page. Creating new tasks can be necessary to add custom functionality which requires server side processing. New background tasks need to be implemented in PBT code and must be integrated into to Registration Server’s code base.
Fill in the form fields with the required values and click Create Task.