Virtual Appliance Installation and Configuration
Download and Verify the Virtual Appliance Image
A .zip Archive containing the virtual appliance’s disk image and VM configuration can be obtained from the following URL:
http://s3download.teamdrive.net/HostServer/TD-Registration-Server-CentOS6-64bit-3.6.0.0.zip
Download the .zip archive and the corresponding SHA1 checksum file:
http://s3download.teamdrive.net/HostServer/TD-Registration-Server-CentOS6-64bit-3.6.0.0.zip.sha1
You should verify the SHA1 checksum to ensure that the zip archive is intact.
You can use the sha1sum command line utility on Linux to verify the
integrity of the downloaded file.
For guidance on how to verify this checksum on other platforms, see the following articles:
- Apple Mac OS X: How to verify a SHA-1 digest on Mac OS X
- Microsoft Windows: Availability and description of the File Checksum Integrity Verifier utility
For additional safety, we recommend to verify the cryptographic signature of the zip archive as well.
You need to have a working GnuPG installation in order to verify this signature. The installation and configuration of GnuPG is out of the scope of this document — see the documentation at https://gnupg.org/ for details.
The public TeamDrive Build GPG key can be downloaded from here:
Import the key into your keyring and double check it matches the fingerprint provided below:
$ gpg --fingerprint support@teamdrive.net
pub   2048R/9A34C453 2014-07-01
      Key fingerprint = 8F9A 1F36 931D BEFA 693B  9881 ED06 27A9 9A34 C453
uid                  TeamDrive Systems (RPM Build Key) <support@teamdrive.net>
sub   2048R/6048C568 2014-07-01
Each official release is signed with this TeamDrive GPG key. The signature can be obtained from the following URL:
http://s3download.teamdrive.net/HostServer/TD-Host-Server-CentOS6-64bit-3.6.0.0.zip.asc
To verify the signature on a Linux operating system, the .zip and corresponding .asc file should be located in the same directory. Now run the following command:
$ gpg --verify TD-Registration-Server-CentOS6-64bit-3.6.0.0.zip.asc
gpg: Signature made Mo 18 Mai 2015 10:34:09 CEST using RSA key ID 9A34C453
gpg: Good signature from "TeamDrive Systems (RPM Build Key) <support@teamdrive.net>"
gpg: WARNING: This key is not certified with a trusted signature!
gpg:          There is no indication that the signature belongs to the owner.
Primary key fingerprint: 8F9A 1F36 931D BEFA 693B  9881 ED06 27A9 9A34 C453
The procedure on other platforms may vary, please consult the GnuPG documentation for details on how to accomplish this task.
Import the Virtual Appliance
After you have confirmed the integrity and authenticity, unzip the zip archive.
The archive contains four files, a virtual disk image (.vmdk), two virtual
machine description files (.ovf) and a manifest file (.mf), containing
the file names and SHA1 checksums.
Import the virtual machine image according to the documentation of your virtualization technology and adjust the VM parameters (e.g. number of virtual CPUs, RAM) based on your requirements, if necessary.
Note
An import to VMWare ESXi might fail with the error:
Unsupported hardware family 'virtualbox-2.2'.
In this case use the .ovf file starting with vmx_*.ovf
Start up the virtual machine and observe the virtual machine’s console output.
First Boot and Initial Configuration
When you boot up the VM image for the first time, the Operating System will perform a number of initial configuration steps, to customize the virtual machine for your environment. For more details on these individual steps, please refer to the Red Hat Enterprise Linux 6 Installation Guide at https://access.redhat.com/documentation/en-US/Red_Hat_Enterprise_Linux/6/html/Installation_Guide/index.html
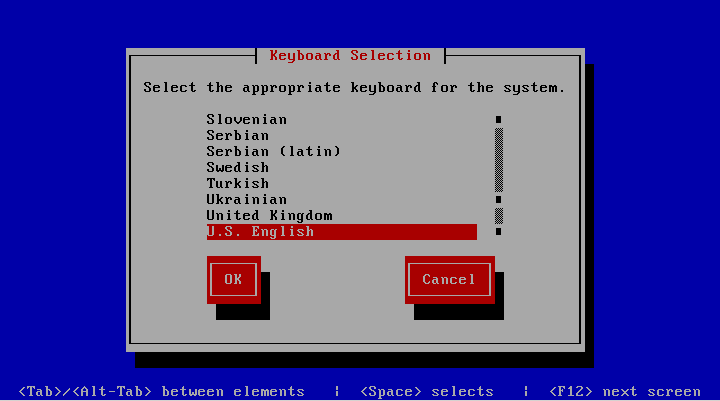
The first screen will prompt you to select your keyboard layout. Use the
cursor keys to select the appropriate layout and press Tab to select
the OK button. Press Space or Enter to proceed.
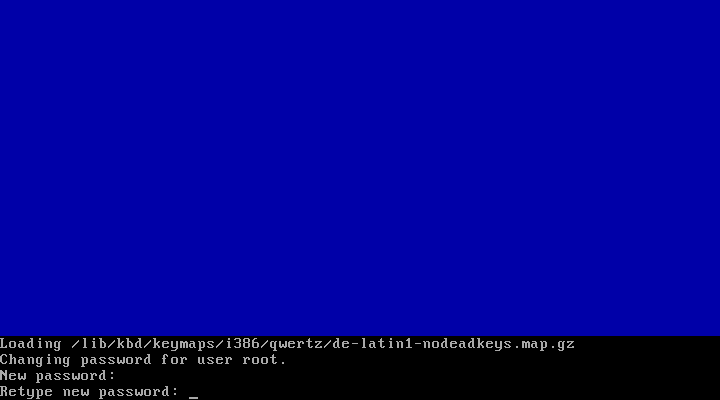
After loading the appropriate keymap, you will now be prompted to enter the password for the root user account. Choose a strong password here — the root user has full administrative privileges on a Linux system. The password won’t be printed on the screen for security reasons, therefore you need to enter it twice to avoid typos.
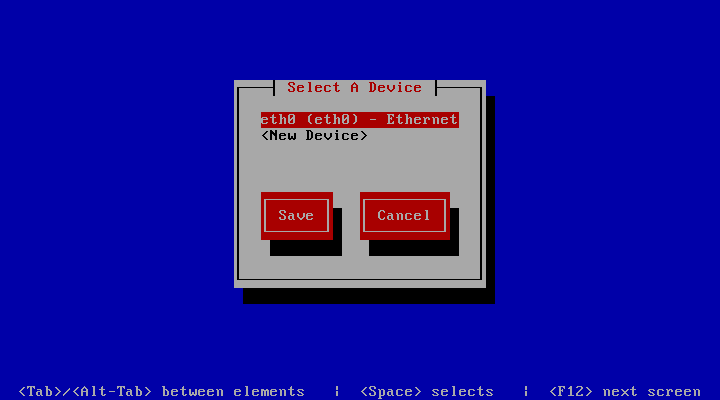
Next, you are required to configure the network device and DNS.

Press Enter to enter the device configuration screen. Select the
network device which is usually named eth0. The hardware description (e.g.
AMD PCnet32 or Ethernet) depends on the virtual network card that your
virtual machine has been configured with. Press Enter to get to the
device configuration details.
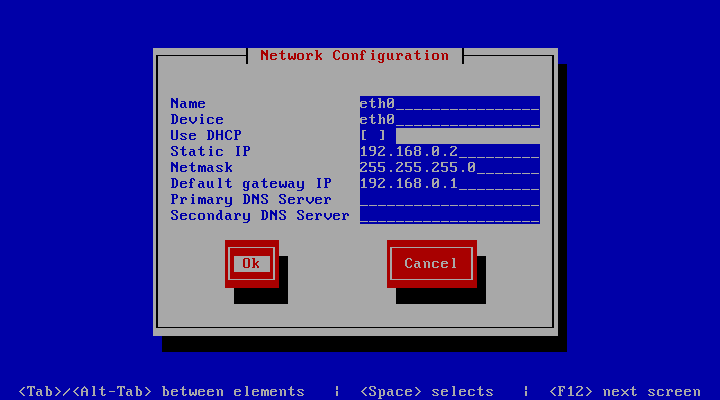
The network configuration screen allows you to specify the IP address and
other network-related settings. Adjust these to your local requirements. Use
the Tab key to move between elements. Select the Ok button and
press Space or Enter to apply your changes. In the device
selection screen, select the Save button to save the device configuration.
Note
Note that you should not use dynamic IP addresses (DHCP) for the TeamDrive Registration Server. The TeamDrive Service depends on static IP addresses and requires a resolvable fully qualified domain name.
Next, select the DNS configuration screen from the network configuration
and adjust the DNS settings to match your environment. Enter your Registration
Server’s host name (e.g. regserver.yourdomain.com) in the Hostname
field and add your DNS server’s IP address(es). Select the Ok button to
apply the DNS changes.

Select the Save&Quit button to proceed with the installation.
Note
A cloned CentOS image in a VMWare environment might exhibit problems updating the network interface. If you are observing issues when configuring the network interface, please follow these instructions: https://blog.linuxnet.ch/centos-reconfigure-network-interfaces-after-cloning-vm-with-vcenter/
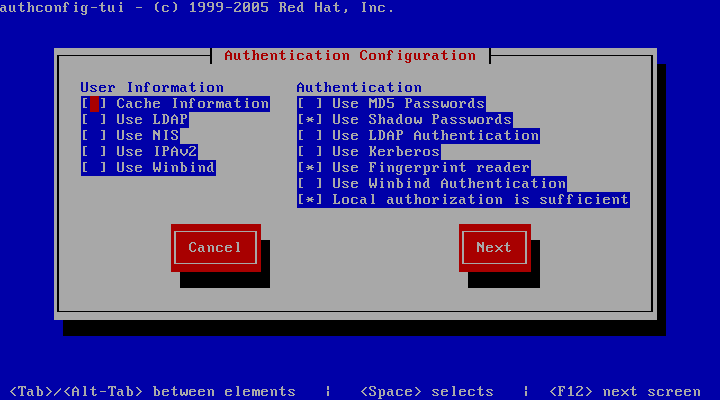
The next screen allows you to modify the local user authentication configuration. Unless you have specific requirements for your local environment, it’s safe to keep the proposed defaults and proceed with the installation by selecting the Next button.
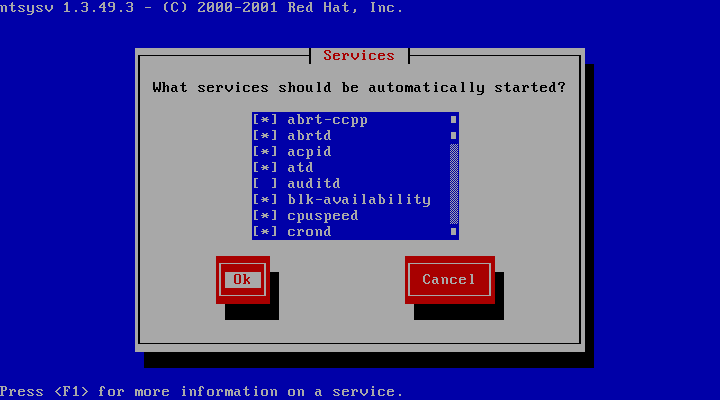
The following screen will ask you to select which services should be started
at system bootup time. Adjust these based on your requirements and local
policies. Also make sure that the MySQL database (service mysqld) is
enabled. Select the Ok button to proceed.
Note
Do not enable the Apache HTTP Server (httpd) yet — this should only
be done after the Registration Server has been configured correctly.
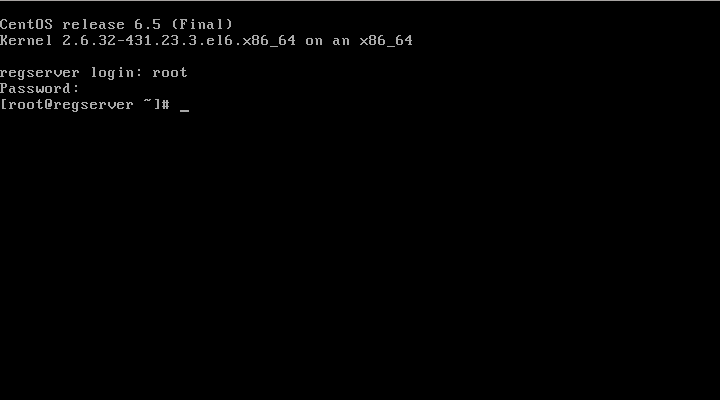
The system will now proceed with the bootup process until you reach the login prompt.
Log in as the root user, providing the login password you defined during
the initial installation.
Updating the Installed Software Packages
As a first step, we strongly advise to perform an update of the installed software packages. New security issues or software bugs might have been discovered and fixed since the time the Virtual Appliance has been built.
This can be done using the yum package management tool. As a requirement,
the Virtual Appliance needs to be connected to the network and needs to be
able to establish outgoing HTTP connections to the remote RPM package
repositories. To initiate the update process, enter the following command:
[root@regserver ~]# yum update -y
yum will first gather the list of installed packages and will then
determine, if updates are available. If any updates need to be installed, the
affected RPM packages will now be downloaded from the remote repositories and
installed.
If the yum update installed any updated packages, consider performing a reboot before you proceed, to ensure that the updates are activated.
Note
Performing a regular update of all installed packages is an essential part
of keeping your system secure. You should schedule a regular maintenance
window to apply updates using yum update (and perform a reboot, to
ensure that the system still boots up fine after these updates). Failing to
keep up to date with security fixes may result in your system being
vulnerable to certain remote exploits or attacks, which can compromise your
system’s security and integrity.
Changing the Default MySQL Database Passwords
The TeamDrive Registration Server Virtual Appliance uses the following default
passwords for the MySQL database. We strongly suggest changing the passwords
of the MySQL users root and teamdrive before connecting this system to
a public network.
| Account type | Username | Password (default) | New Password |
|---|---|---|---|
| MySQL Database Server | root | teamdrive | |
| MySQL Database Server | teamdrive | teamdrive |
To change the passwords for the MySQL root and teamdrive user, please
use the following commands. First change the password for the root user:
[root@regserver ~]# mysqladmin -u root -pteamdrive password
Warning: Using a password on the command line interface can be insecure.
New password: <new password>
Confirm new password: <new password>
Next, log into the MySQL database as the root user (using the new password)
and change the password for the user teamdrive:
[root@regserver ~]# mysql -u root -p
Enter password: <new password>

[...]

mysql> SET PASSWORD FOR 'teamdrive'@'localhost' = PASSWORD('<new password>');
Query OK, 0 rows affected (0.00 sec)

mysql> quit
Bye
Note
Take note of the new MySQL password for the teamdrive user, as you will
need to change some configuration files using that password as outlined in
the following chapters Configuring the Registration Server’s MySQL configuration and Administration Console MySQL Configuration.