Initial Host Server Configuration
Registering and Activating the Host Server
From a desktop system that can connect to the Host Server via HTTPS, start a web browser like Mozilla Firefox, Google Chrome (or any other modern web browser) and start the configuration process by opening the following URL in your browser:
https://hostserver.yourdomain.com/admin/
This should open the Host Server Setup page. If you get an error message like “500 Internal Server Error”, check the log files for any errors. See chapter Web Installation: “500 Internal Server Error” for details.
Note
If you haven’t replaced the server’s self-signed default SSL certificate yet, your web browser most likely will complain about an untrusted/insecure connection. Either replace the SSL certificate with an appropriate one before you proceed, or ignore this message.
Alternatively, you can access the Setup Page via an unencrypted HTTP connection. In this case, you will be prompted to proceed using an insecure connection.
When everything is configured correctly, you will see the TeamDrive Host Server Setup page that will guide you through the initial configuration:

Host Server Setup Page
Fill out the fields according to your environment and requirements:
- Admin Username
- The name of the user account with full administrative privileges.
- Admin Password
- The adminstrator password that you need to provide to login to the Host Server Administration Console.
- Admin Email
- The email address of the Administrator. This field is optional. This email address is used for 2-factor authentication (if enabled).
- Host Server Domain Name
- The domain name of this Host Server. This is the domain name that TeamDrive clients will use to create and access Spaces. The setup tool will try to determine and fill in this name automatically, please ensure that it is a fully-qualified and resolvable domain name (the setup will try to connect the server using the domain name; if your network configuration doesn’t allow, that an outgoing request will go back to the server, try to add the domain name to the /etc/hosts file).
Note
Dont use an IP address instead of a domain name, because using an IP address will cause the following problems: Register a SSL certificate for an IP address can be a problem and the TeamDrive client applications on the Apple platform (MAC and IOS) require a valid and official SSL certificate for the HTTPS communication. Apple only allows HTTPS connections. The second problem is, that the IP of the server cant be changed anymore. There is no possibility in the TeamDrive clients to change the space URL later on. If the server will be not longer reachable by the initial name any more, all Spaces are lost and cant be synchronized any more.
- Provider Code
- The Host Server will be assigned to a Provider on the specified Registration Server. The Provider Code (aka Distributor Code) is a 4 character code, consisting of letters A-Z and 0-9. If you don’t have a Provider Code yet, please contact TeamDrive Systems for obtaining you individual Provider Code. This code can not be changed later on.
- Host Server API IP Whitelist
- Enter a comma separated list of IP addresses of systems that are permitted to access the Host Server API. This list must include the IP address of the Registration Server’s Admin Console. Please contact TeamDrive Systems for the correct value if you don’t manage your own Registration Server.
- Reg. Server Domain Name
- Enter the fully qualified domain name of the Registration Server. Setup will ping this domain to ensure that the Registration Server is running and reachable. Please contact TeamDrive Systems for the correct value if you don’t manage your own Registration Server.
- Registration Server Name
- All Host Servers must be registered with a Registration Server. Enter the name of your Registration Server here. Please contact TeamDrive Systems for the correct value if you don’t manage your own Registration Server.
- Reg. Server API Salt
- The API Salt is a code that allows the Host Server to validate calls to the
Host Server’s API. This value must match the value of the
APIChecksumSaltsetting on the Registration Server to avoid “man in the middle”-attacks. Please consult the Registration Server Documentation on how to obtain it or contact TeamDrive Systems for the correct value if you don’t manage your own registration server.
After you have entered all the required details, click Setup to initiate the Host Server configuration and registration process with the Registration Server. After performing some initial checks, the setup process will summarize the information that it will use to perform the registration with the selected Registration Server.
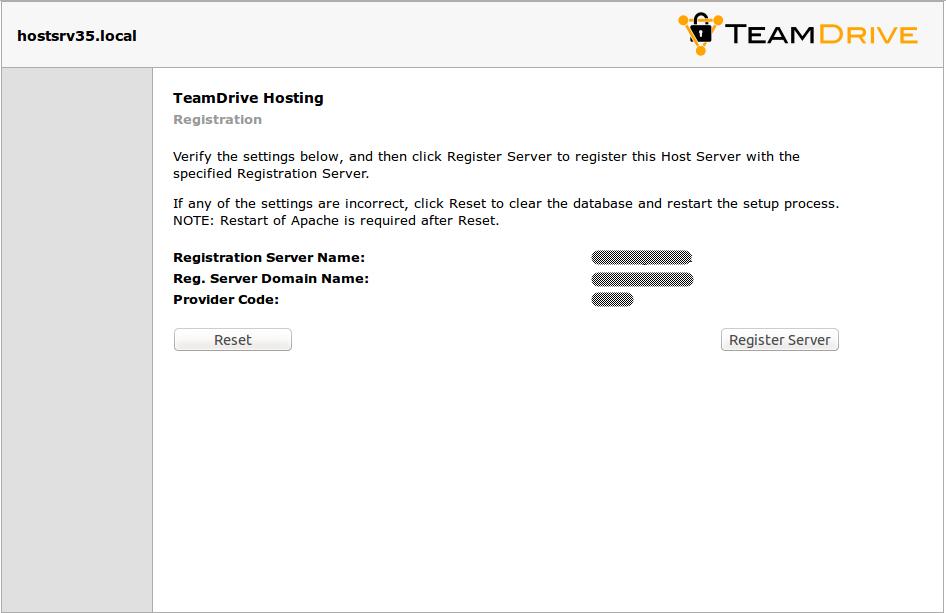
Host Server Registration Confirmation
Click Register Server to proceed with the registration, Reset to abort and return to the setup page.
Warning
If you need to restart the Registration/Activation process because of incorrectly entered values, it’s absolutely necessary to restart the Apache HTTP Server to roll back some internal changes:
[root@hostserver ~]# service httpd restart
Communication within the TeamDrive network is encrypted with a public-private
encryption key pair. During registration, this key pair is generated by the
Host Server and the public key is sent to the Registration Server. This will
result in the creation of a new user account on the Registration Server,
named tdhosting.<host domain name>, e.g.
tdhosting.hostserver.yourdomain.com, and a device and license associated
with that user.
Befor the Host Server registration can be concluded, you are required to enter an Activation Code. For security reasons, you will not receive this code automatically. If you don’t run your own Registration Server, you need to request this code from your Registration Server operator (usually TeamDrive Systems).

Host Server Activation Window
The activation code can be obtained from the Registration Server’s Administration Console in Server Management -> Manage Servers page.
Take note of this activation code, enter it into the Host Server’s activation page and click Activate server.
Setup and Administration
Upon successful activation, you will be presented with the Host Server’s Administration Console Login Screen.
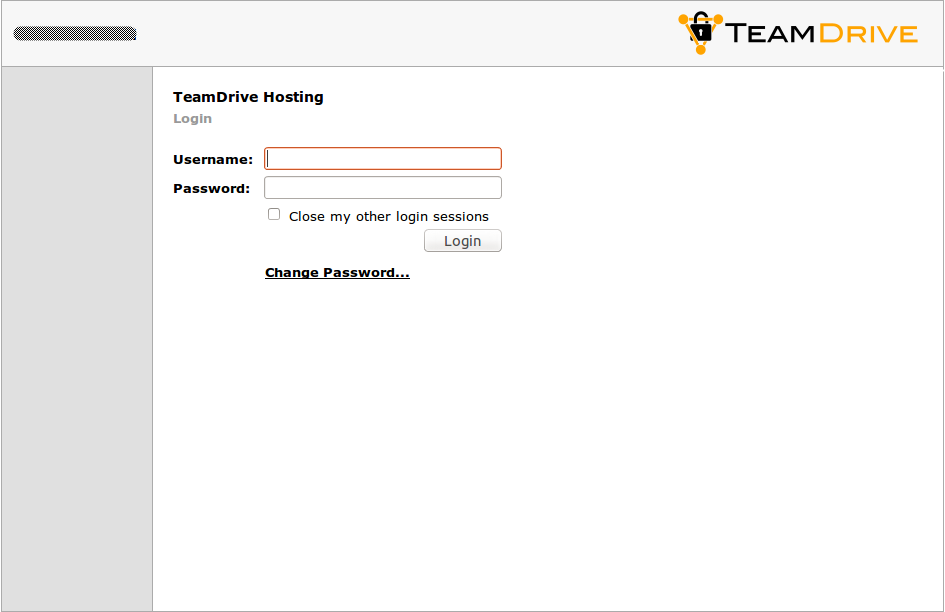
Host Server Admin Console: Login Screen
Enter the username and password you defined during the initial setup to log in.
Upon successful login, you will see the Host Server’s Administration Console Home Screen.
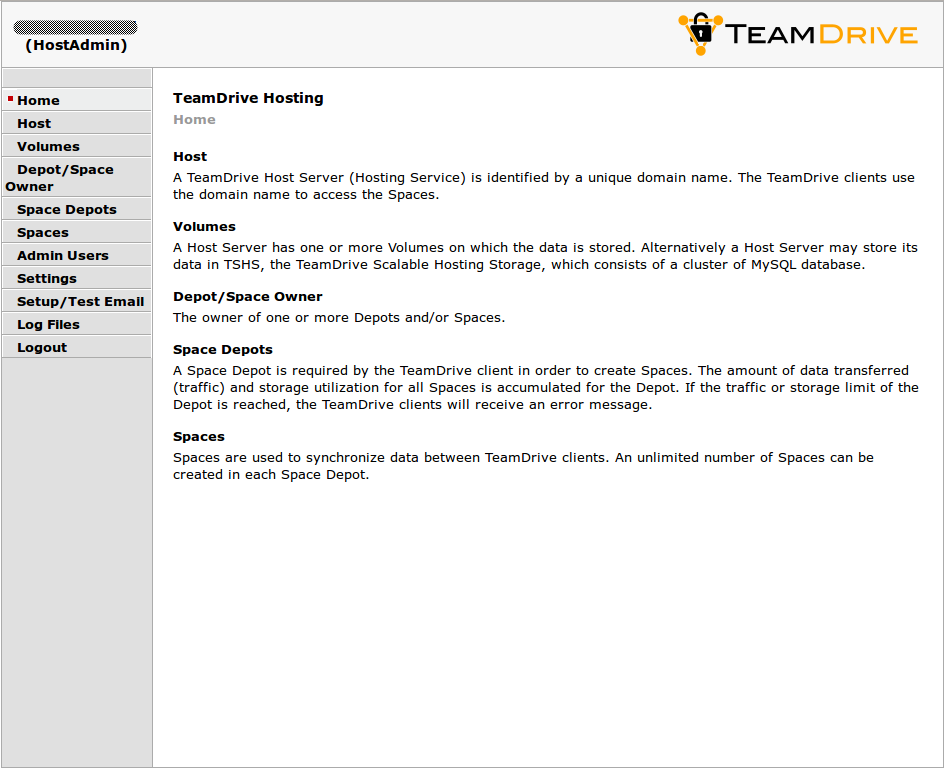
Host Server Admin Console: Home Screen
At this point, you have concluded the Host Server’s basic configuration and registration. See the TeamDrive Host Server Administration Guide for more details on how to use the Administration Console and how to accomplish other configuration tasks.
Associating the Host Server with a Provider
As a final step, you need to associate your host server with your provider account on the Registration Server. This can be performed via the Registration Server’s Admin Console, which you can usually access via the following URL:
https://regserver.yourdomain.com/adminconsole/
Please see the Registration Server Manual for details.
Log in with your provider login and click the tab Edit Distributor Settings (Registration Server version 3.0.017 and older), Edit Provider Settings (Registration Server version 3.0.018) or Server Management -> Provider Settings (Registration Server 3.5).
In the section Provider Settings, click the Button labelled HOSTSERVER.
Change the configuration setting HAS_DEFAULT_DEPOT from False to
True and click “Save”.
The HOST_SERVER_NAME setting and related options should now appear in the
list of HOSTSERVER settings. Select your host server from the selection
list and click “Save” to apply this change.
If required, adjust the other settings from the HOSTSERVER category to match
your requirements, e.g. HOST_SERVER_URL, HOST_DEPOT_SIZE and
HOST_TRAFFIC_SIZE.
Testing Client Access
The Host Server has now been set up. To test its functionality, start a TeamDrive Client and create or log into a user account belonging to the Provider Code this Host Server has been associated with.
When creating a new space, the Host Server should now be available in the “Server” selection list of the Client’s “Create a Space” dialogue.
After the space has been created, take note of the Server URL and Space ID in the Client’s Space Information panel. The URL should point to the host name of your Host Server.
On the Host Server, a directory with that Space ID as the directory name
should have been created in /spacedata/vol01/. If you add files to this
Space via the TeamDrive Client, the encrypted versions should appear in the
respective Space’s data directory shortly afterwards.
Also try publishing a file (requires a Professional Client License), the file
should be uploaded to the Host Server in unencrypted form and placed into a
subdirectory below the public directory of that space. Try downloading the
file using the URL provided. Again, the URL should point to your new Host
Server.